- Jun 15, 2024: Moved Notes and Freeform to separate posts
- Feb 3, 2024: Added hyperkey suggestions (here)
- Aug 11, 2024: Added native menu search key (here)
I could have titled this
You think you know about the apple ecosystem but you don’t. I spent 100 hours trawling through various settings and options to create this guide just for you.
but that won’t be me, so here you are.
The inbuilt apple apps are pretty good. And for people who do not have specific or complex needs, and use an all apple device setup, should definitely explore using just apple apps for their digital information system.
The App List
Apple comes with multiple in-built apps. While some of them have very defined scopes, like Apple Music or Apple Arcade, some of them don’t (like Notes, Reminders). They are easy to get into but hard to experience all features of. Those are the apps we will focus on in this post.
This document is interspersed with personal opinions, and is not just a listing of features, similar to how I did for Google Docs (Google Docs Is Underrated ). I am no longer an apple devices only person (was one for an year), so you will see some comments about how/why/whether the interoperability can matter.
The one “app” we will look at besides these — is the System Settings app. There are some hidden treasures in there, that we should definitely explore! The last thing we will look at is the magic of ⌥ or the Option key. It changes the context menus so often, that you might miss so many options in the operating system.
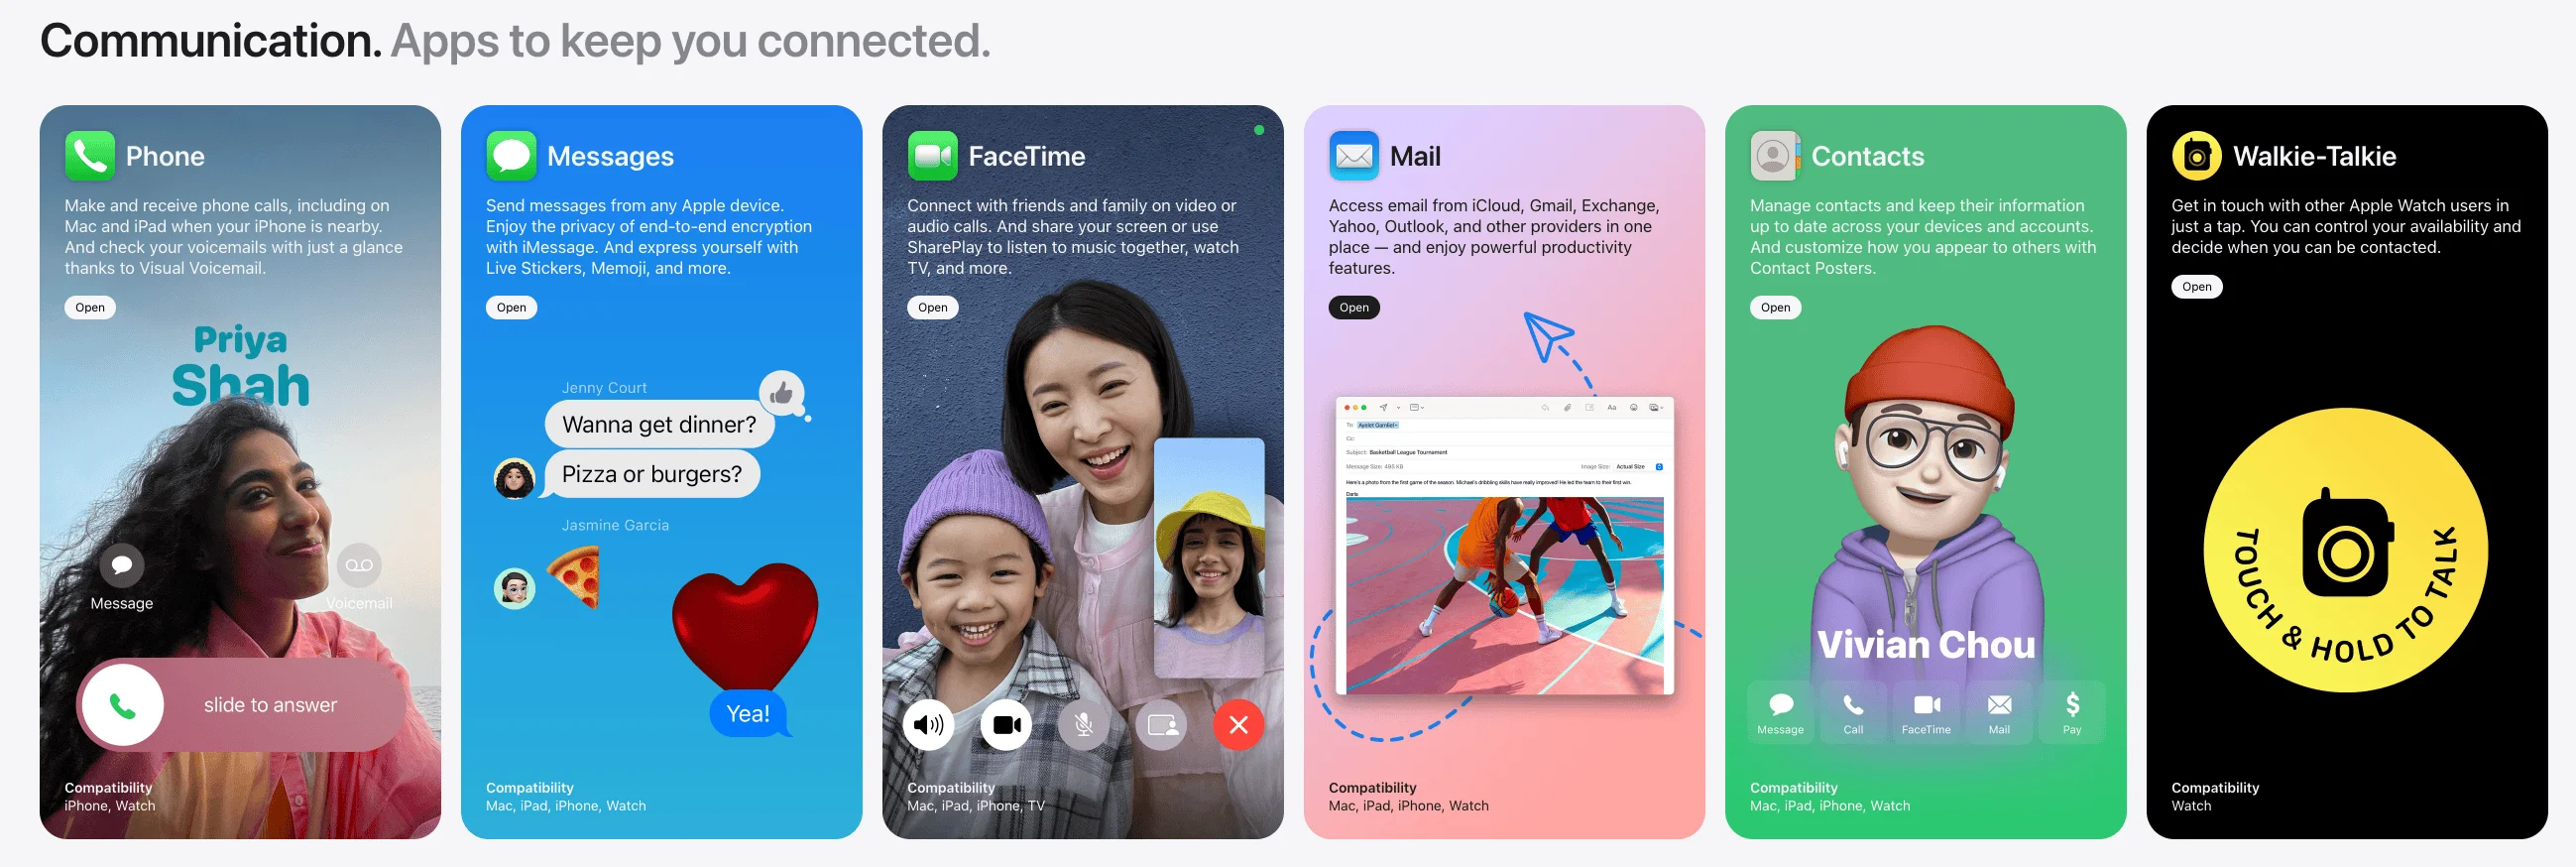
Communication
Productivity
Entertainment and Home
Creativity
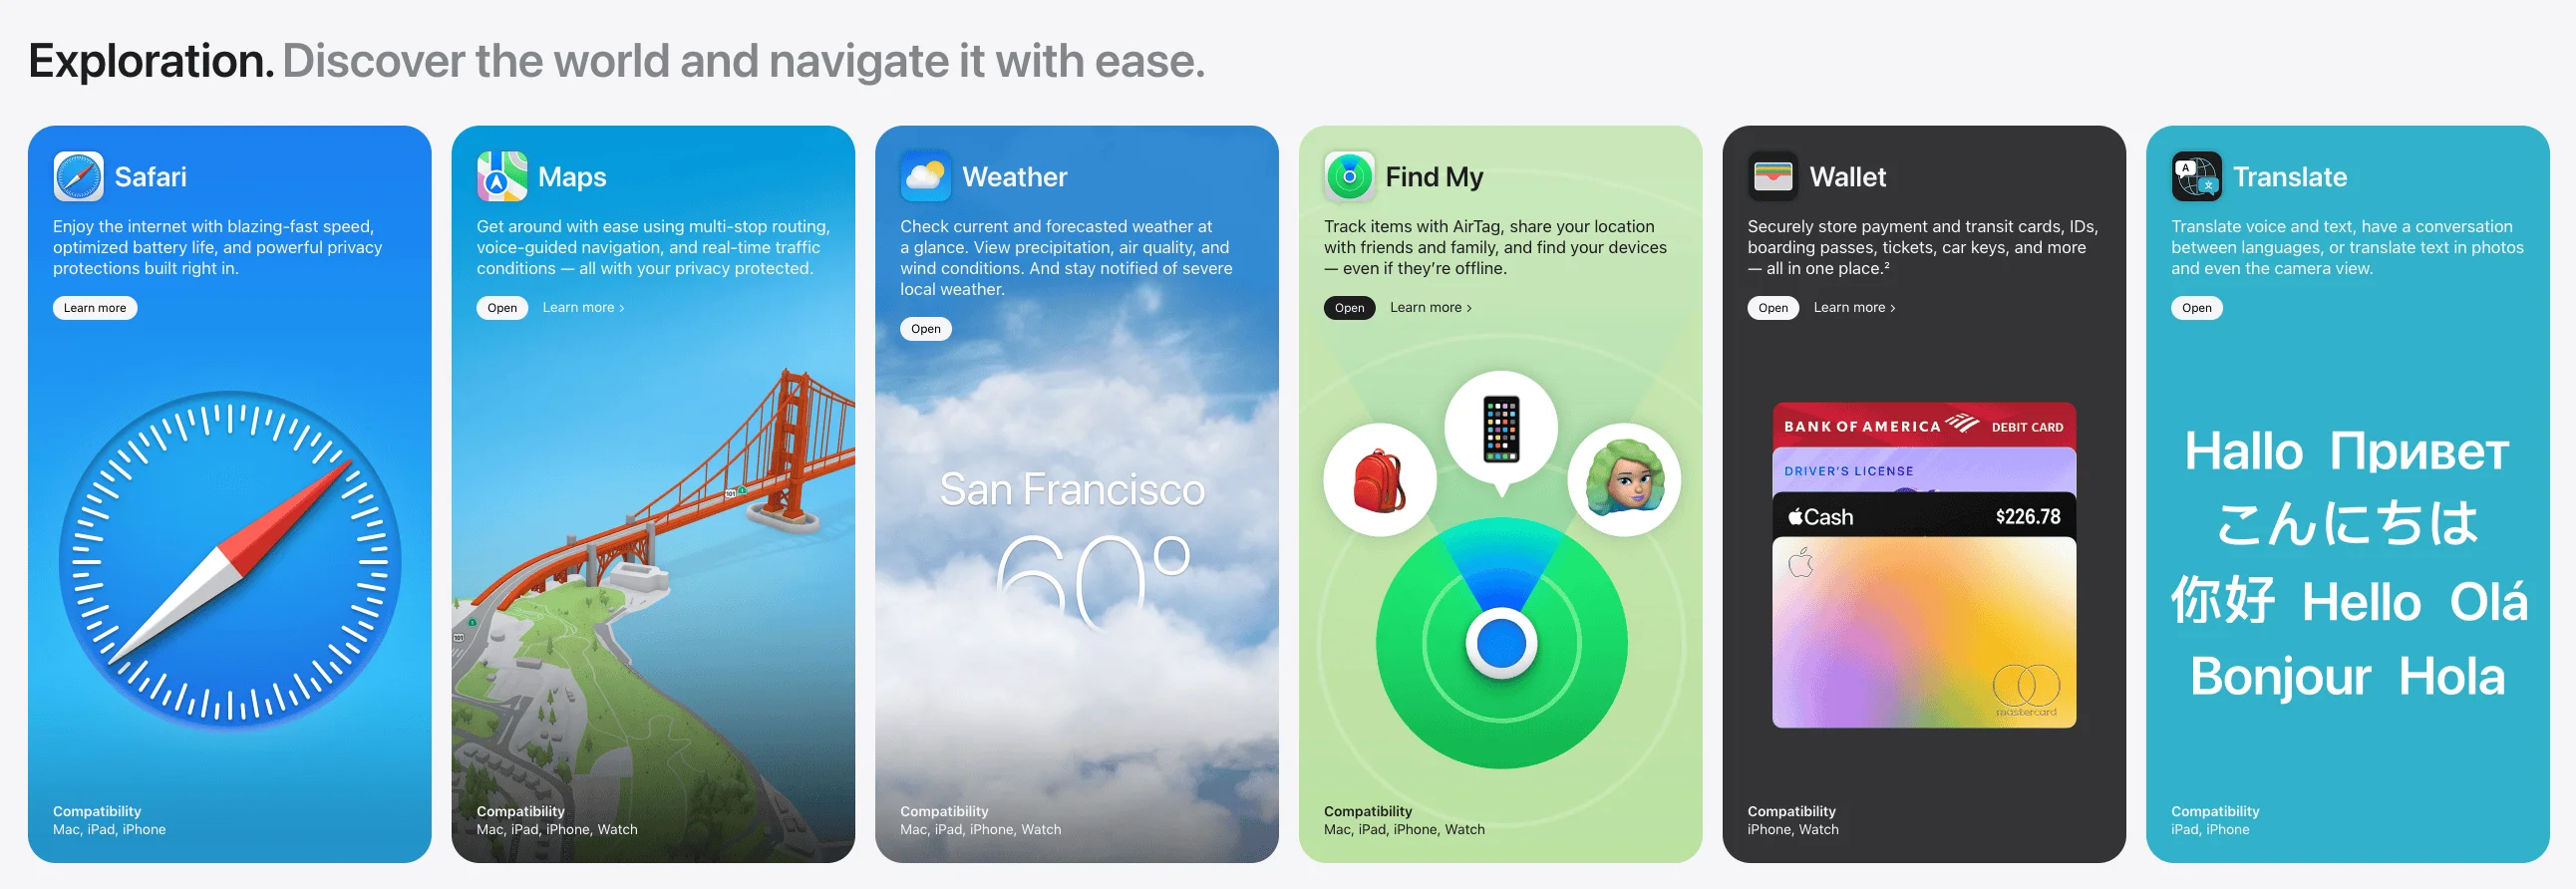
Exploration
Health and Fitness
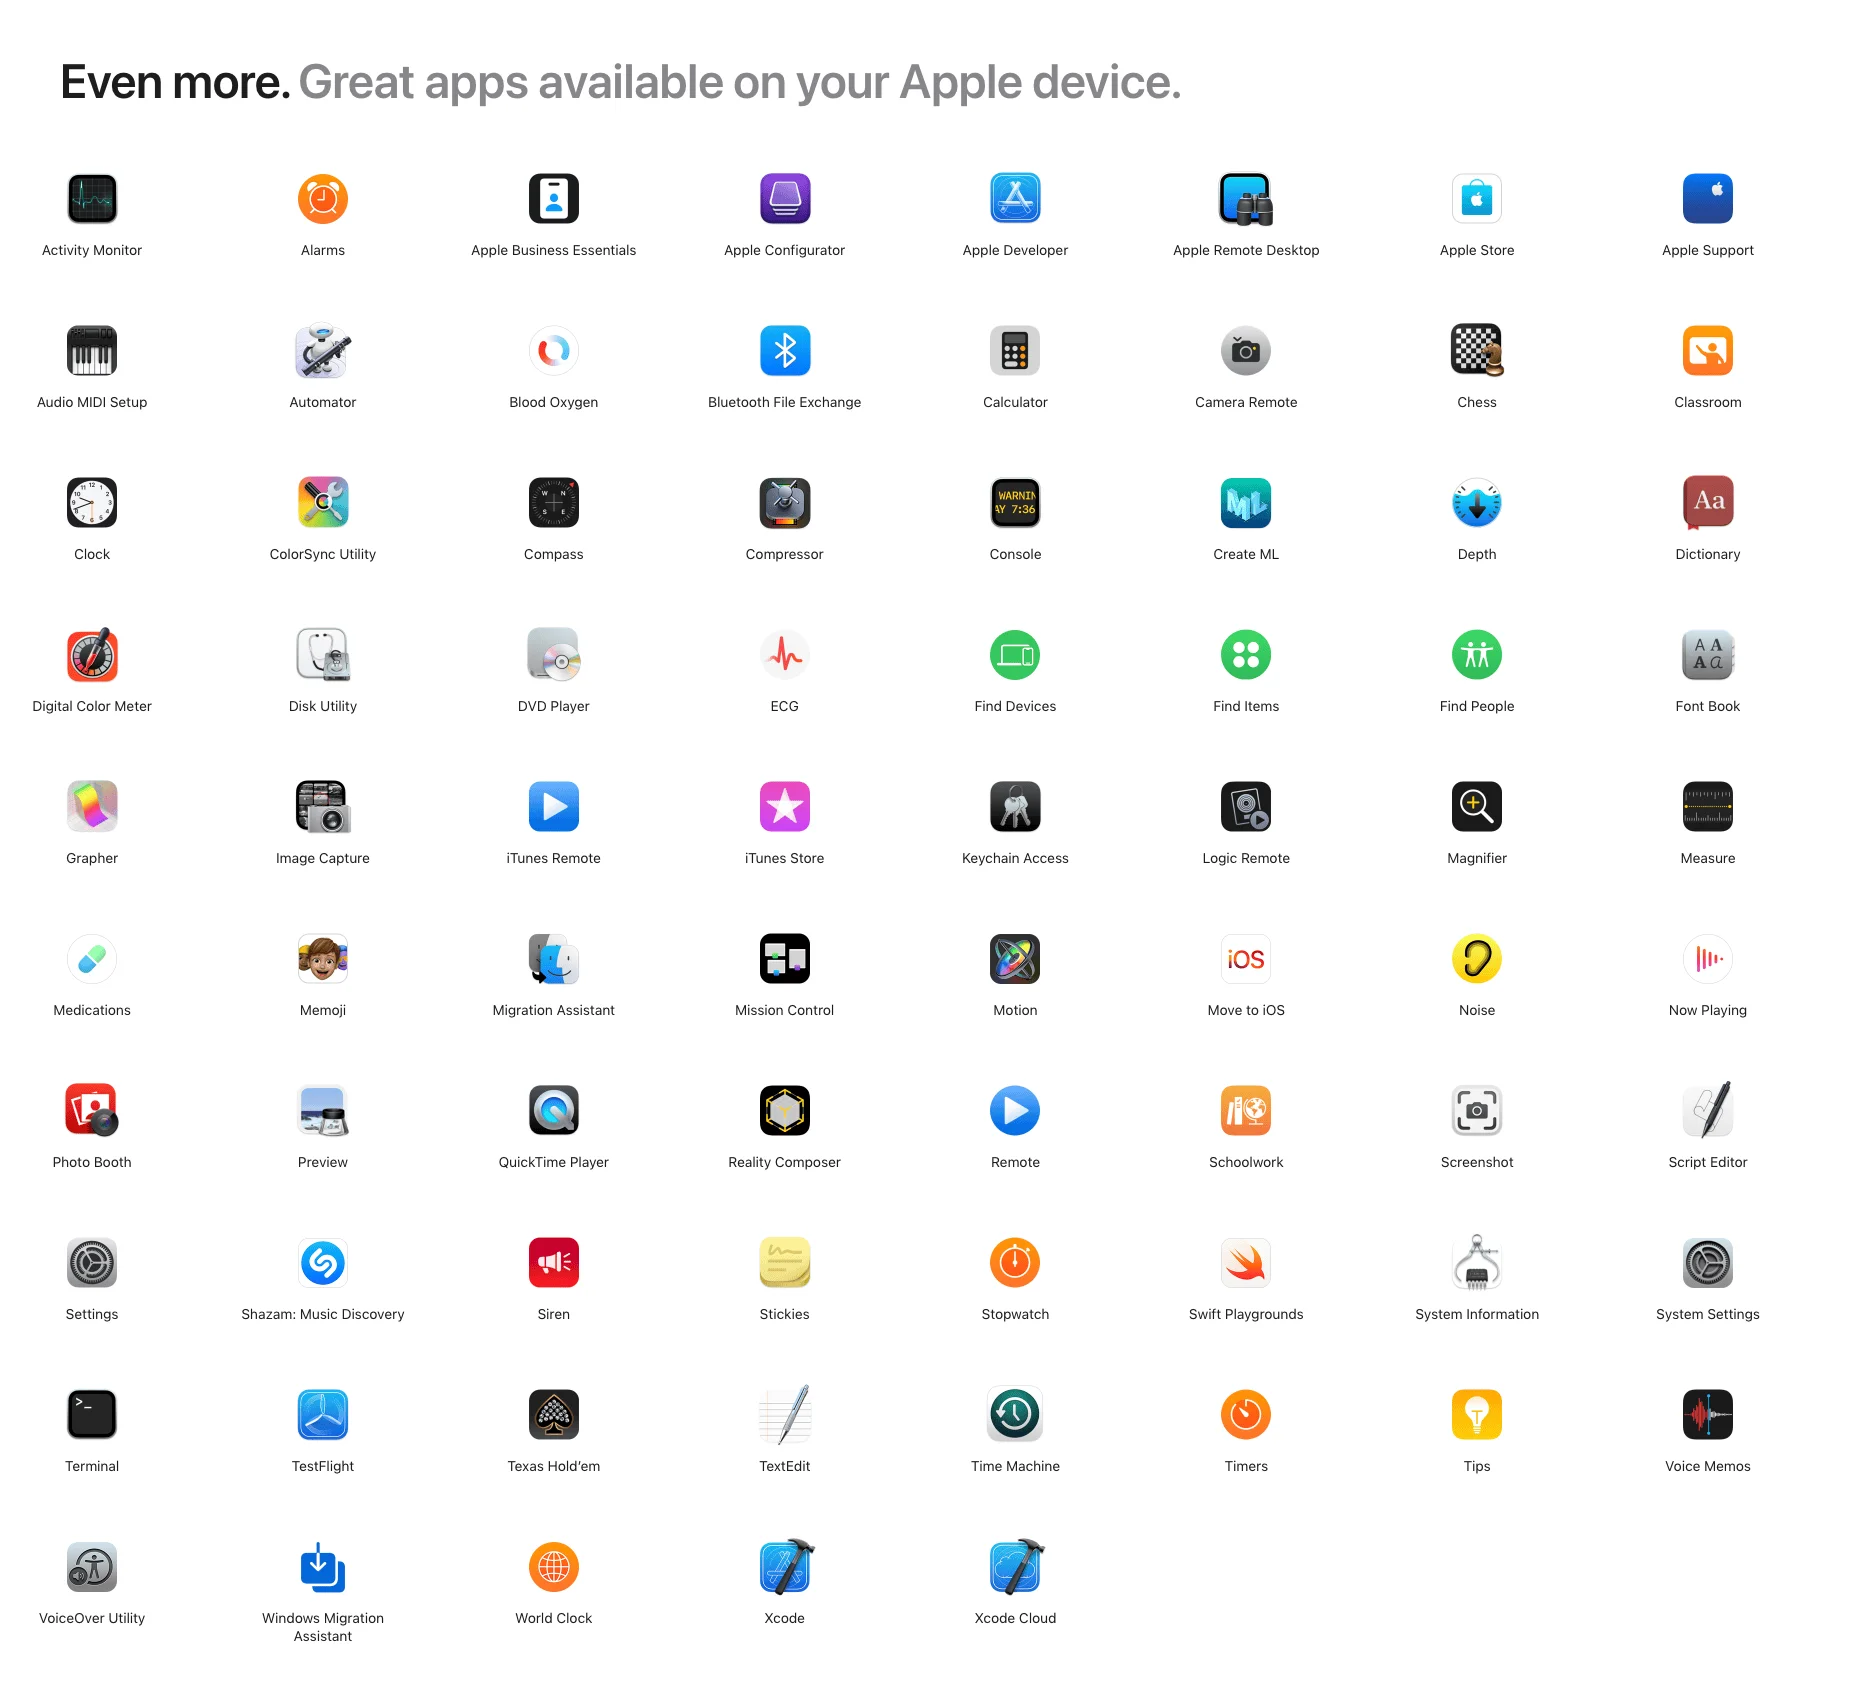
And all others
All the guides
Notes App
The notes app that comes with Apple is pretty good. It is very much a watered down, but single app version of Google Docs (you might not know how much it can do, check that here: Google Docs Is Underrated), just locked to Apple devices. But there are a few things that make it special, which we will talk about here. Most of these suggestions will focus on the MacOS app, but I will add some details about the iOS app too.
Freeform App
The freeform app is a digital whiteboarding solution from Apple. It is a pretty good app, that is again, Apple only, but supports all devices (yes, including Apple Vision Pro, yes, you can have an 80 inch whiteboard right in front of you). It is collaborative like most Apple productivity apps, and it is better built than most people give it credit for.
It is hard to compare this app to an ecosystem, because Google no longer has a whiteboarding app, Microsoft whiteboard is something I won’t touch with a 10ft pole, Figjam, while awesome is not really made for iPad (and you want whiteboards to support iPad), Miro/Milanote are good, but then, they are equivalent to comparing Notion/Tana/Obsidian to Apple Notes, Goodnotes/Concepts are not whiteboarding apps, Explain Everything is very education focussed, tldraw has poor feel with Apple pencil, and Heptabase doesn’t work on iPad at all.
Other Applications
One of the most common use cases that I see is recording content. MacBook comes with an inbuilt screen recorder that can be accessed using shortcuts mentioned here or through the app. Even though the app is named screenshot, it also acts as a screen recorder. You can also choose the option to show/hide mouse clicks, and whether you want to record a portion of the screen or the whole screen. Screenshot also interacts with ⌥ , Space and ⇧ keys.
It does have 2 issues though: it doesn’t work with presenter overlay so you cannot record your webcam, and it has no way to record output audio. QuickTime Player, another Apple app allows you to record internal audio (output audio), but it is an either/or situation - you either record your microphone or the internal sound. While you can use something like blackhole as audio device, that will be complicated and it still does not solve the lack of webcam.
Facetime
(and other video calling softwares)
MacOS comes with inbuilt video conferencing features, namely, Portrait, Center Stage, Studio Light and Reactions. Reactions are turned on by default in MacOS Sonoma, and I will sincerely suggest to turn them off. Portrait blurs your background, Center Stage kinda (not really, because it is inbuilt you know) shifts the camera direction so that you are in center of the screen, and Studio Light relights your image and background.
One of the newer features though is Presenter Overlay, which allows you to customize screen share, only in Facetime and Zoom. To add a presenter overlay when screen sharing in FaceTime, click the Video icon, select Screen Share, then under Presenter Overlay choose Off for a separate window, Small for a movable cropped view, or Large to prioritize the video feed over the shared screen.
Screen Sharing
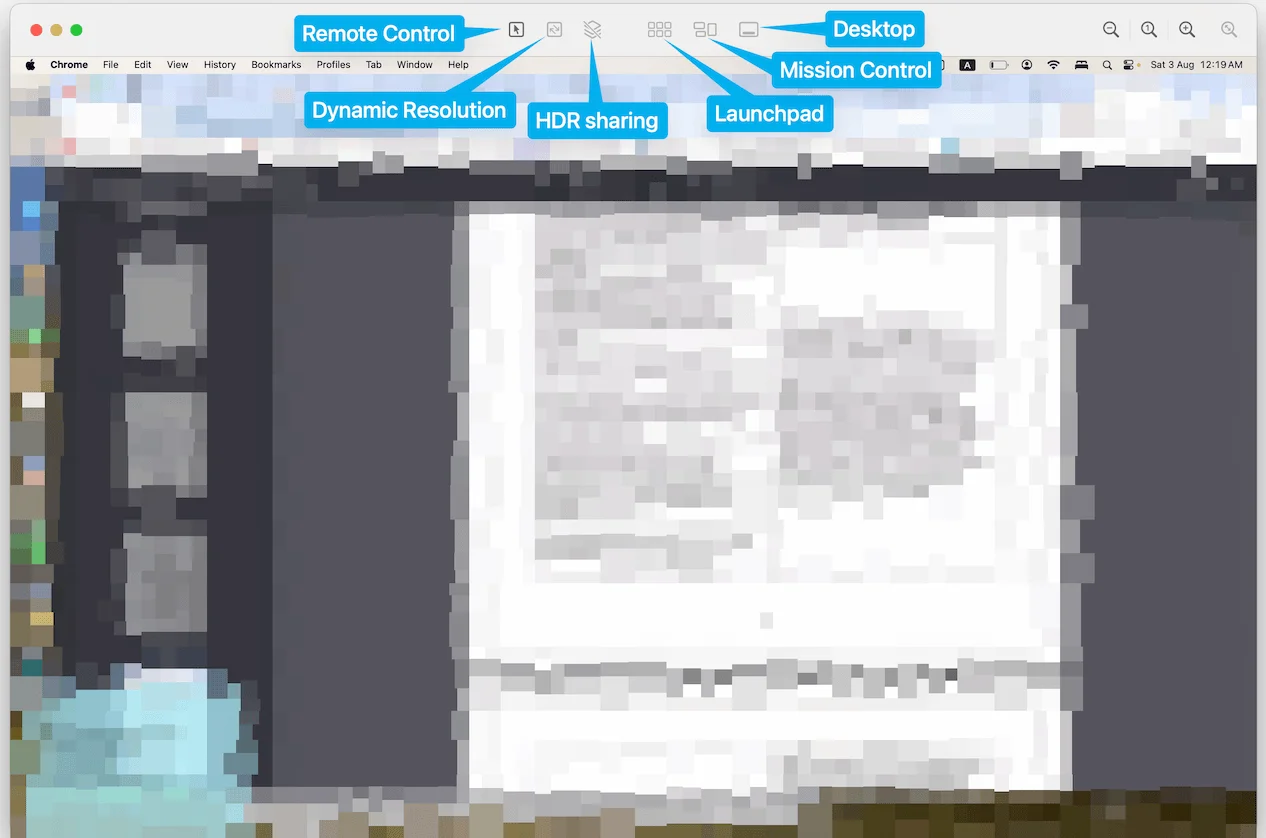
You can learn more about screensharing on MacOS here. It seems like it internally uses a Facetime API because you see those controls pop up in the menu bar.
[Expand toggles to see screenshots]
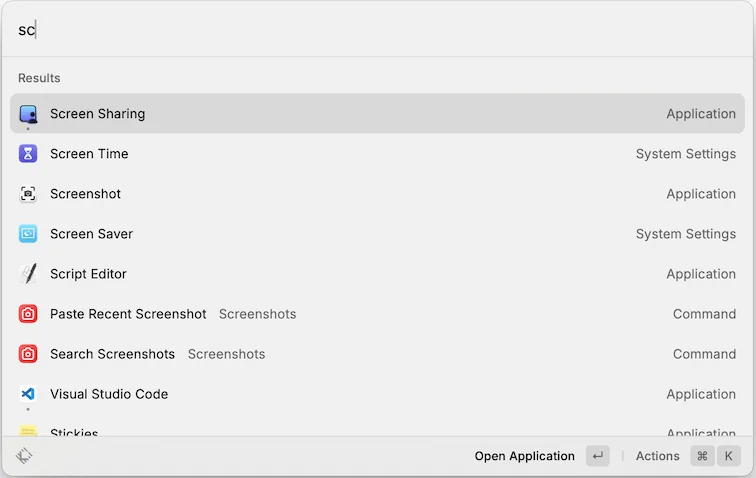
Screensharing is a hidden application. It doesn’t show up on your Application or Launchpad. You need to open screensharing app using Raycast or Spotlight.
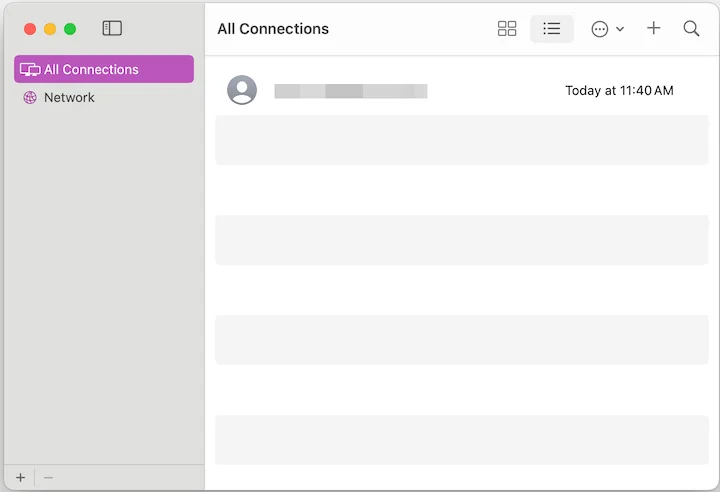
It opens up a screen showing all the connections you have. You can also create groups to manage all connections you have had.
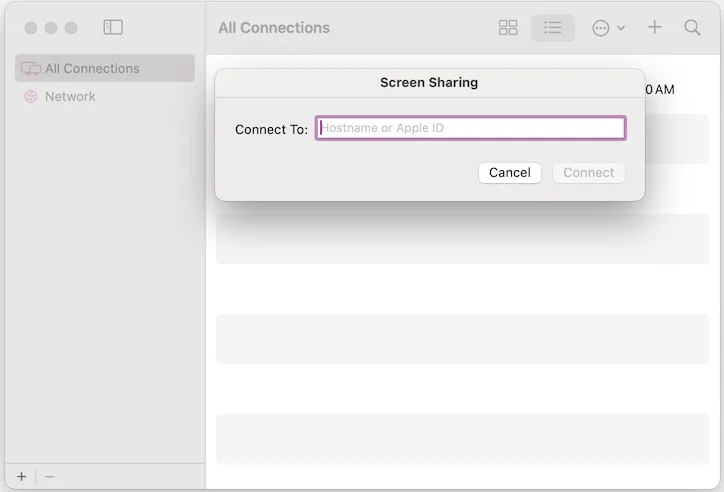
And voila, now you are screensharing.
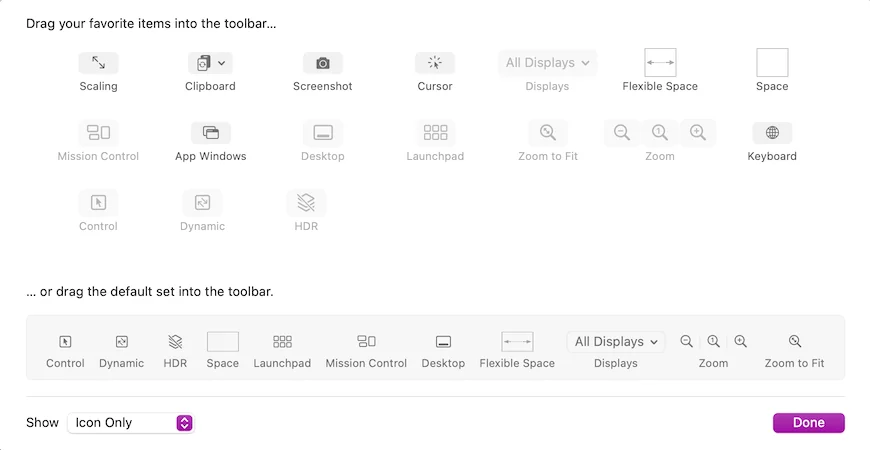
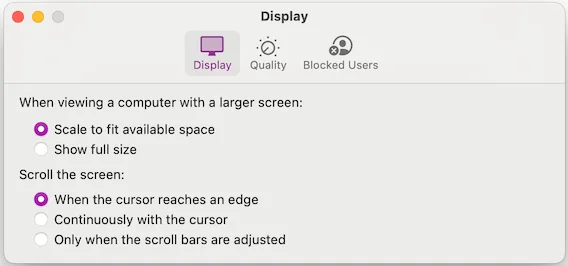
And modify the settings for display scaling and quality
Screensharing shares microphone by default. You can mute the microphone in the Connection menu item. It also shares clipboard by default which can be changed in the Edit menu item.
You can copy paste or drag text, images and files during screensharing. Universal clipboard is not available during screensharing. You can’t have both Screen Sharing and Remote Management on at the same time.
Finder
- You can create document templates, such that you don’t need to worry about modifying the original document, hence, called “stationery” in MacOS. To do this, select the document and use
Get Infoor⌘ + I. In the general section, selectStationery pad. Make sure it is a document you can edit, and not a folder or an alias. Now, everytime you open that document, it will duplicate itself — without you needing to worry about modifying the original.
- You can batch rename items. Select multiple items and
^ + clickone of them and then chooseRename. You can choose to replace, add or change text in the names, define the format by choosing where to put the index, counter and date. - On desktop, you can quick arrange your files using Stacks. When you save a file to it, it will be added to the appropriate stack.
Right clickon desktop or press^ + ⌘ + 0and chooseUse Stacks. You can browse files in desktop stack using two fingers on trackpad, expand a stack by clicking it, collapsing by clicking the down arrow, and change the grouping mechanism usingRight click > View > Group Stacks Byor^ + click > Group Stacks By.
Apps I have don’t use
- Photos: I have never used the Photos app that comes with Apple devices. I do not want them to be locked into an ecosystem, and I very much prefer Google Photos’ features, so that won’t change anytime. Here is the official guide to Photos app though:
Quick Tips:
- Photo’s live text that can be enabled by first selecting text and then using
Control (^) + Clickon selected text allows you to perform these actions: copy, definitions, translations, web searches, sharing, calling, emailing, and opening links. - Duplicates appear automatically in the Duplicates album in the sidebar.
- To copy the subject of a photo, simply perform a
Control (^) + Clickon the photo and select the optionCopy Subject. You can then paste the subject into various applications such as documents, emails, text messages, or notes. - To access information about popular landmarks, art, plants, flowers, pets, and other objects in a photo, simply open the photo and locate the
Infobutton in the toolbar. If aVisual Look Upicon is present on the photo, click on it to gather relevant details.
- Photo’s live text that can be enabled by first selecting text and then using
The “System Settings” App
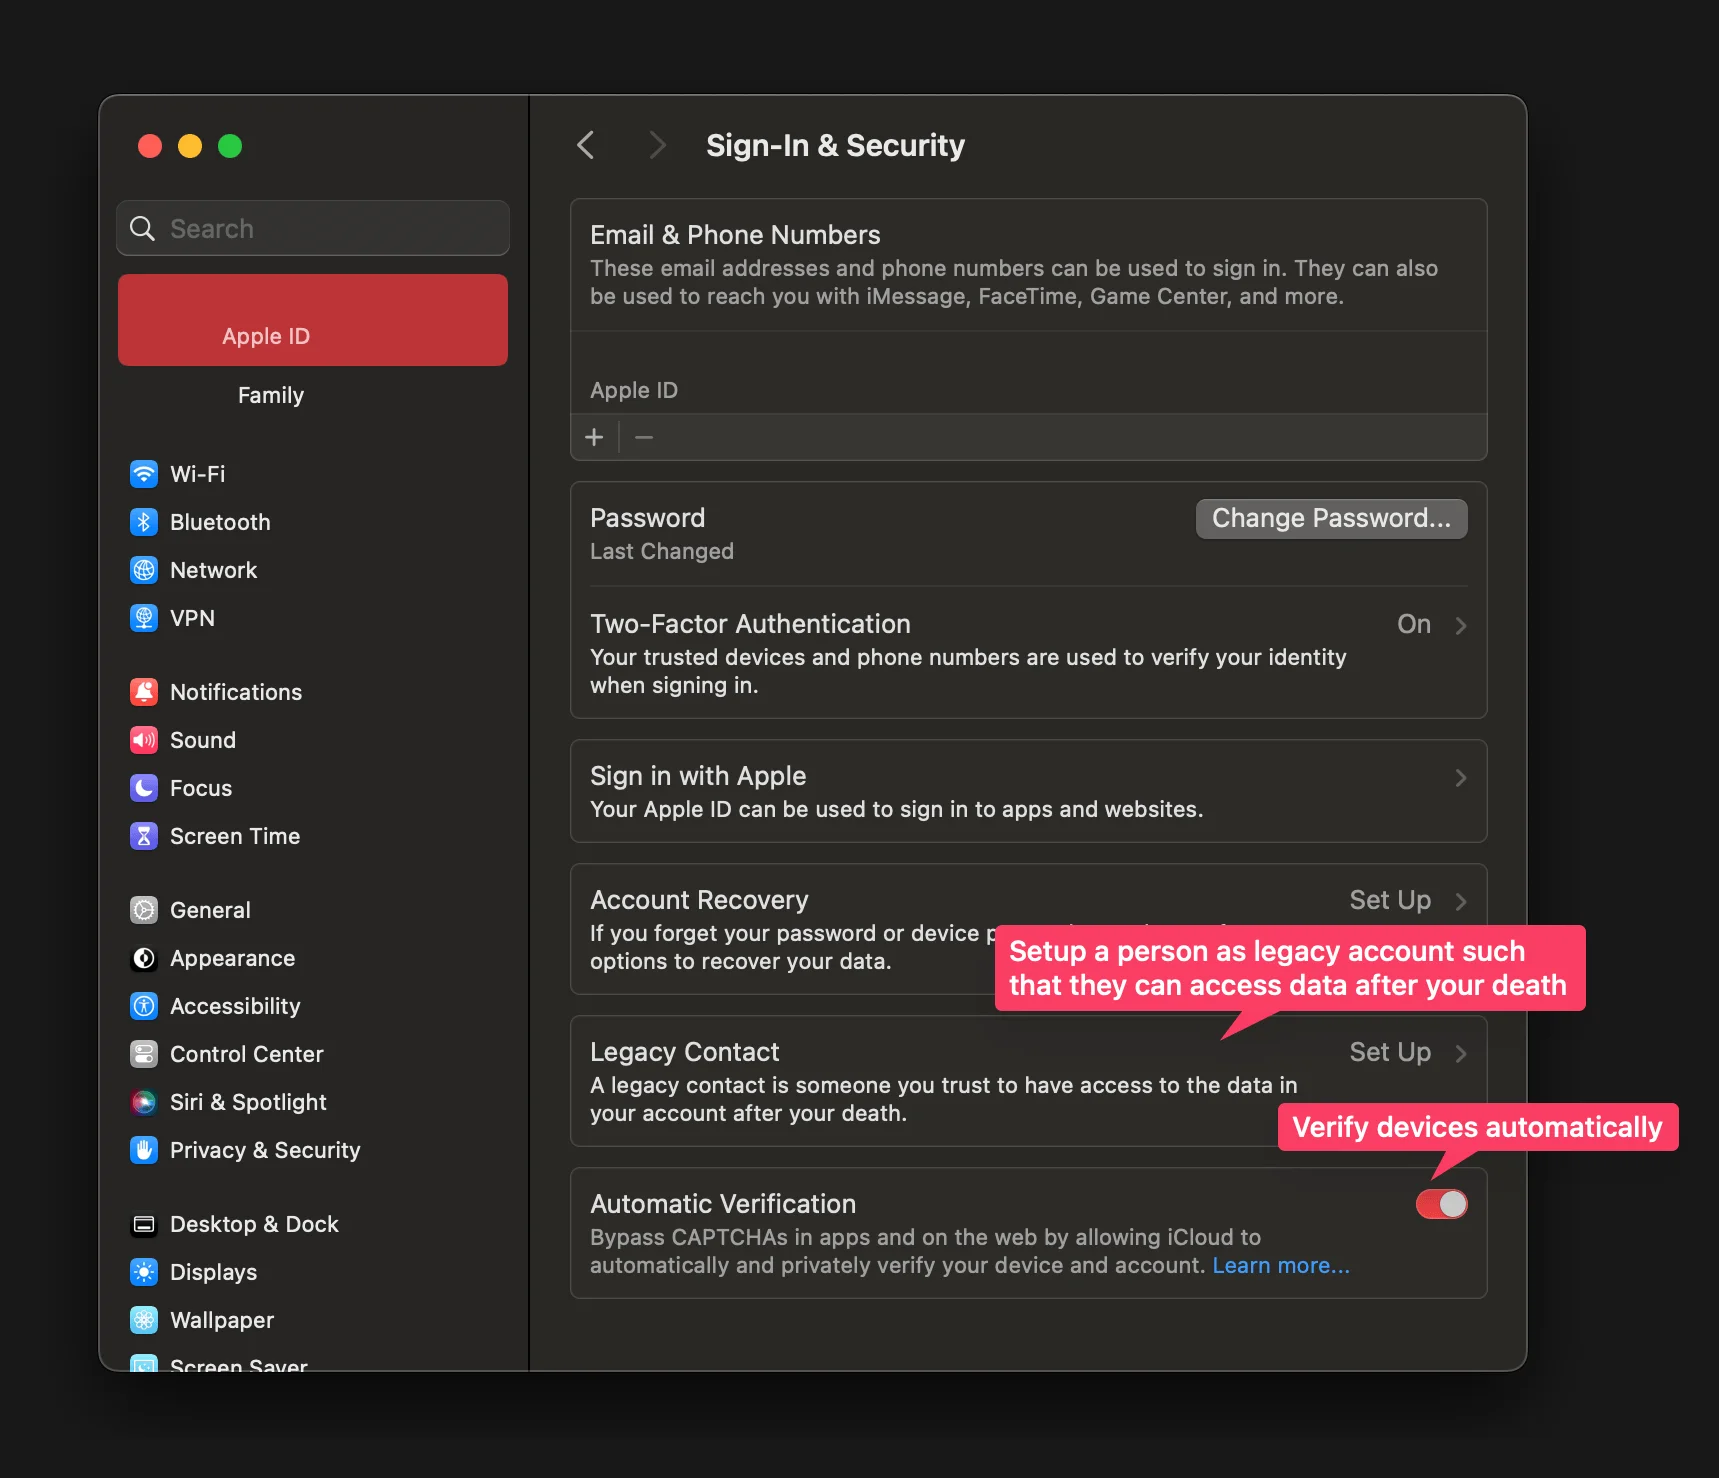
You can set a legacy contact, a person who can access your data after your death. Makes things much easier with photos and notes (more here). Automatic Verification privately authenticates you to participating apps and websites, so that you don't have to complete a CAPTCHA. All you have to do is sign in to the app or site (more here).
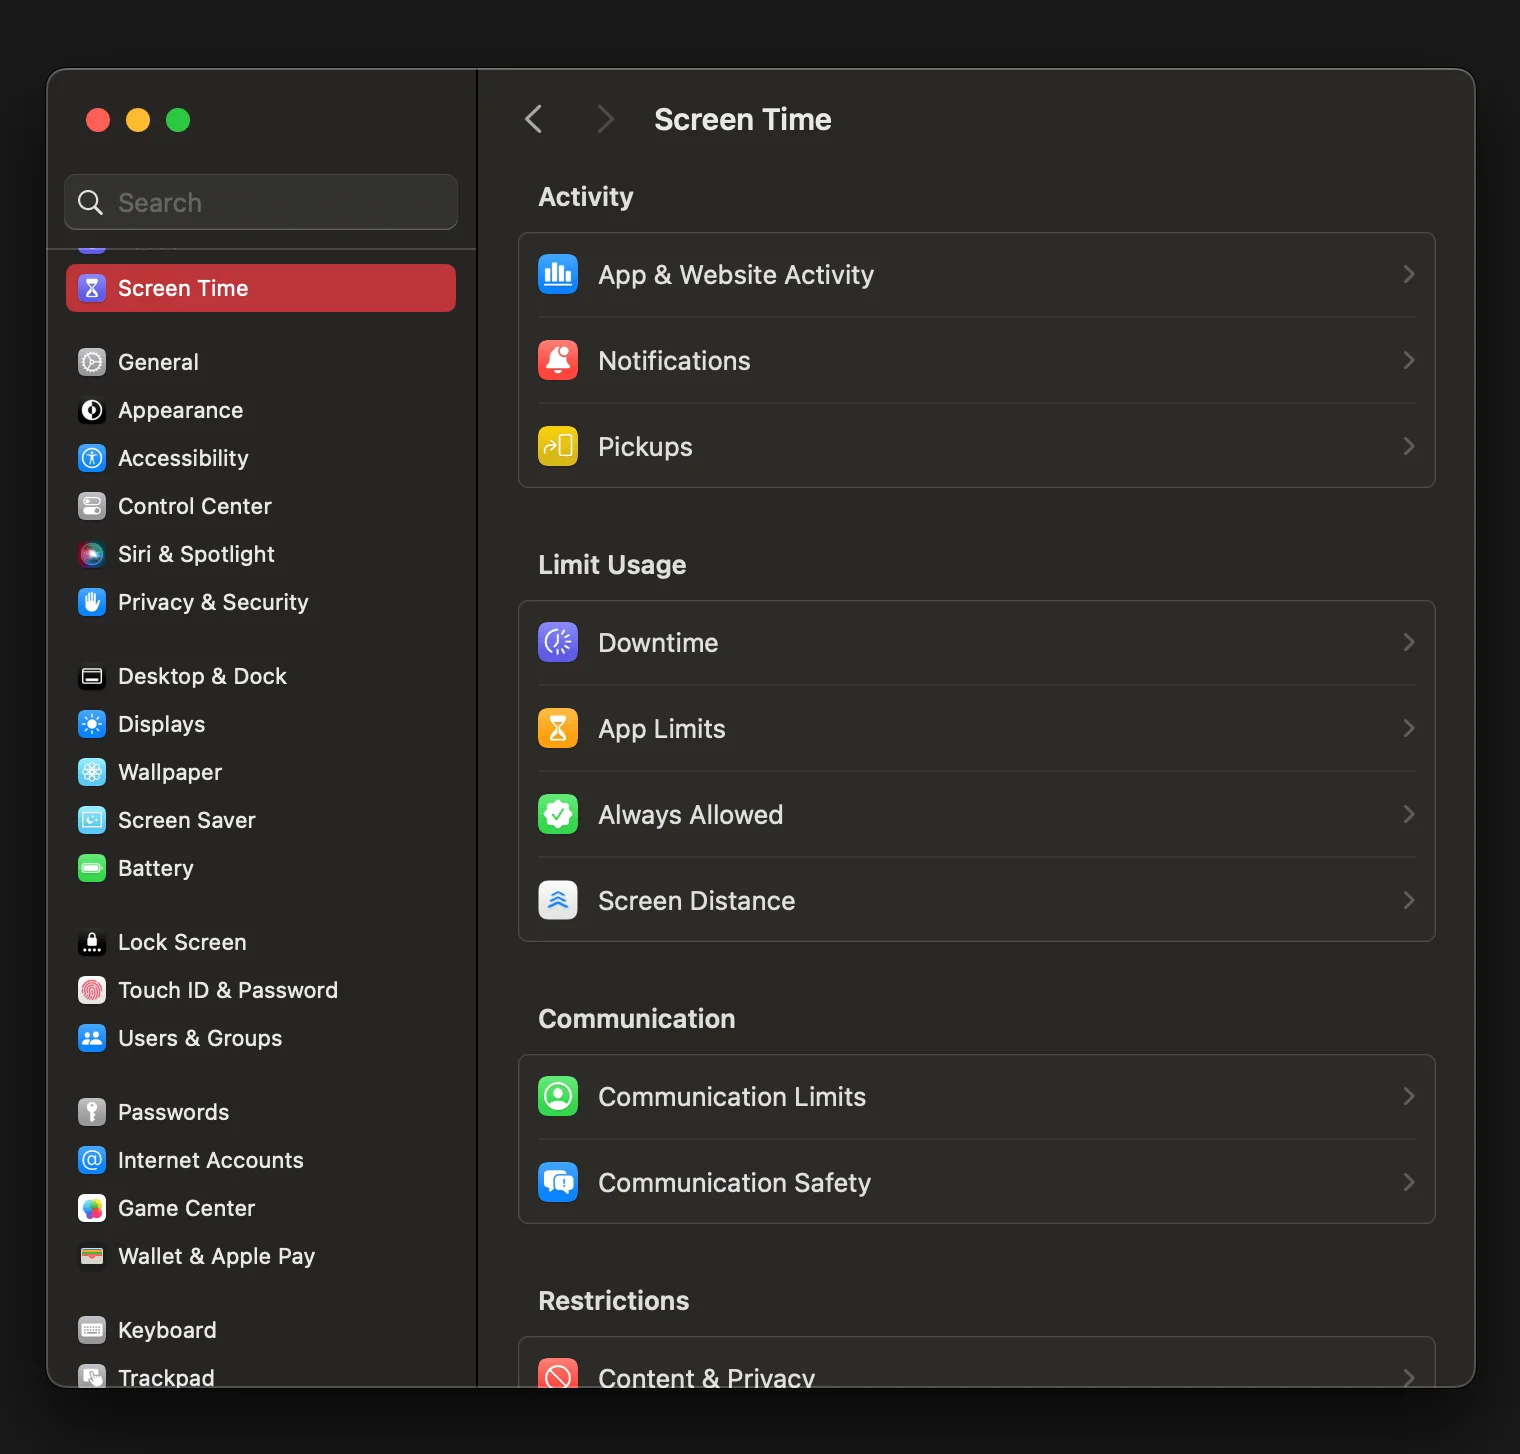
You can set basic app limits using Screen Time feature in Settings. These can be defined on a per app basis, and can be set to be blocked during downtime.
Spotlight
and QuickTime Player
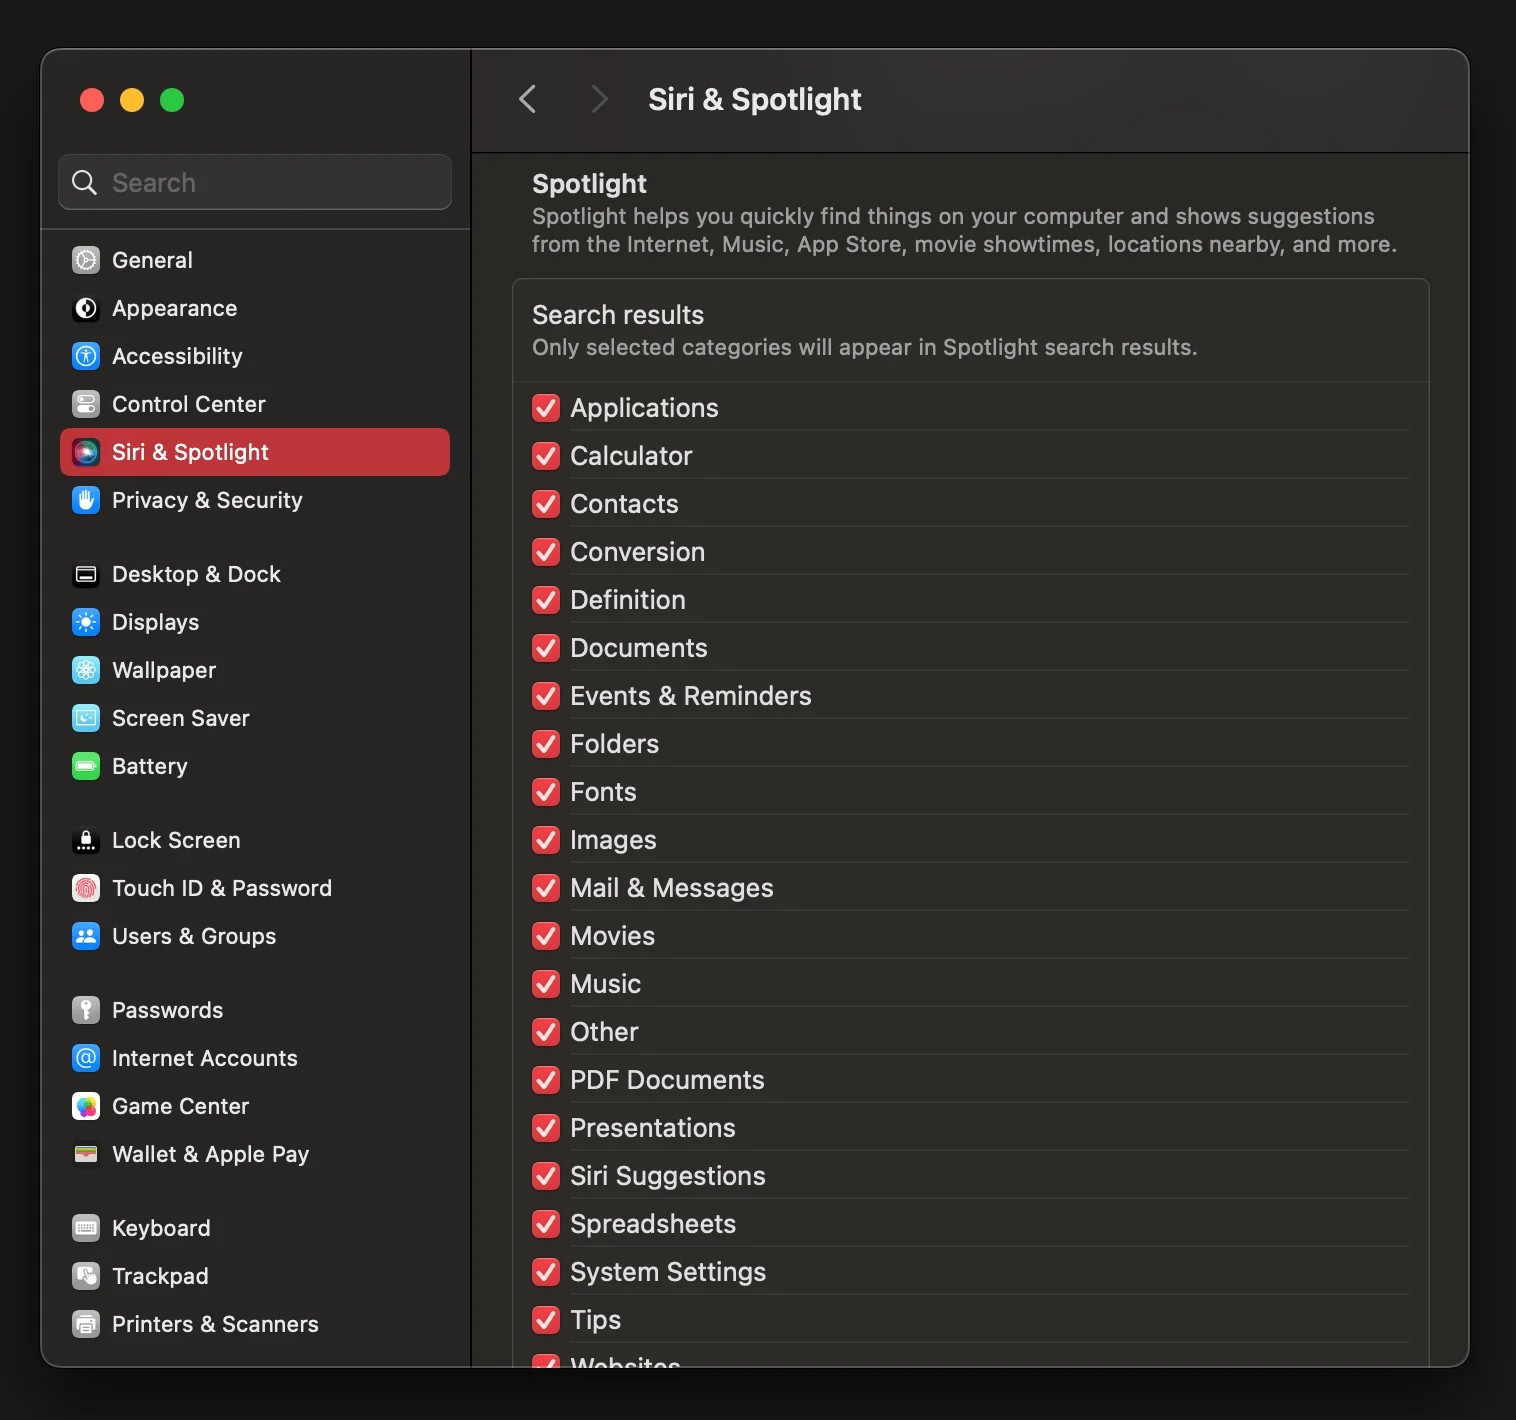
Spotlight search range. You can decide what kind of things you want to show up in Spotlight using Siri & Spotlight. For example, you can choose to exclude Fonts, because who, other than designers ever wants to string match with a font?
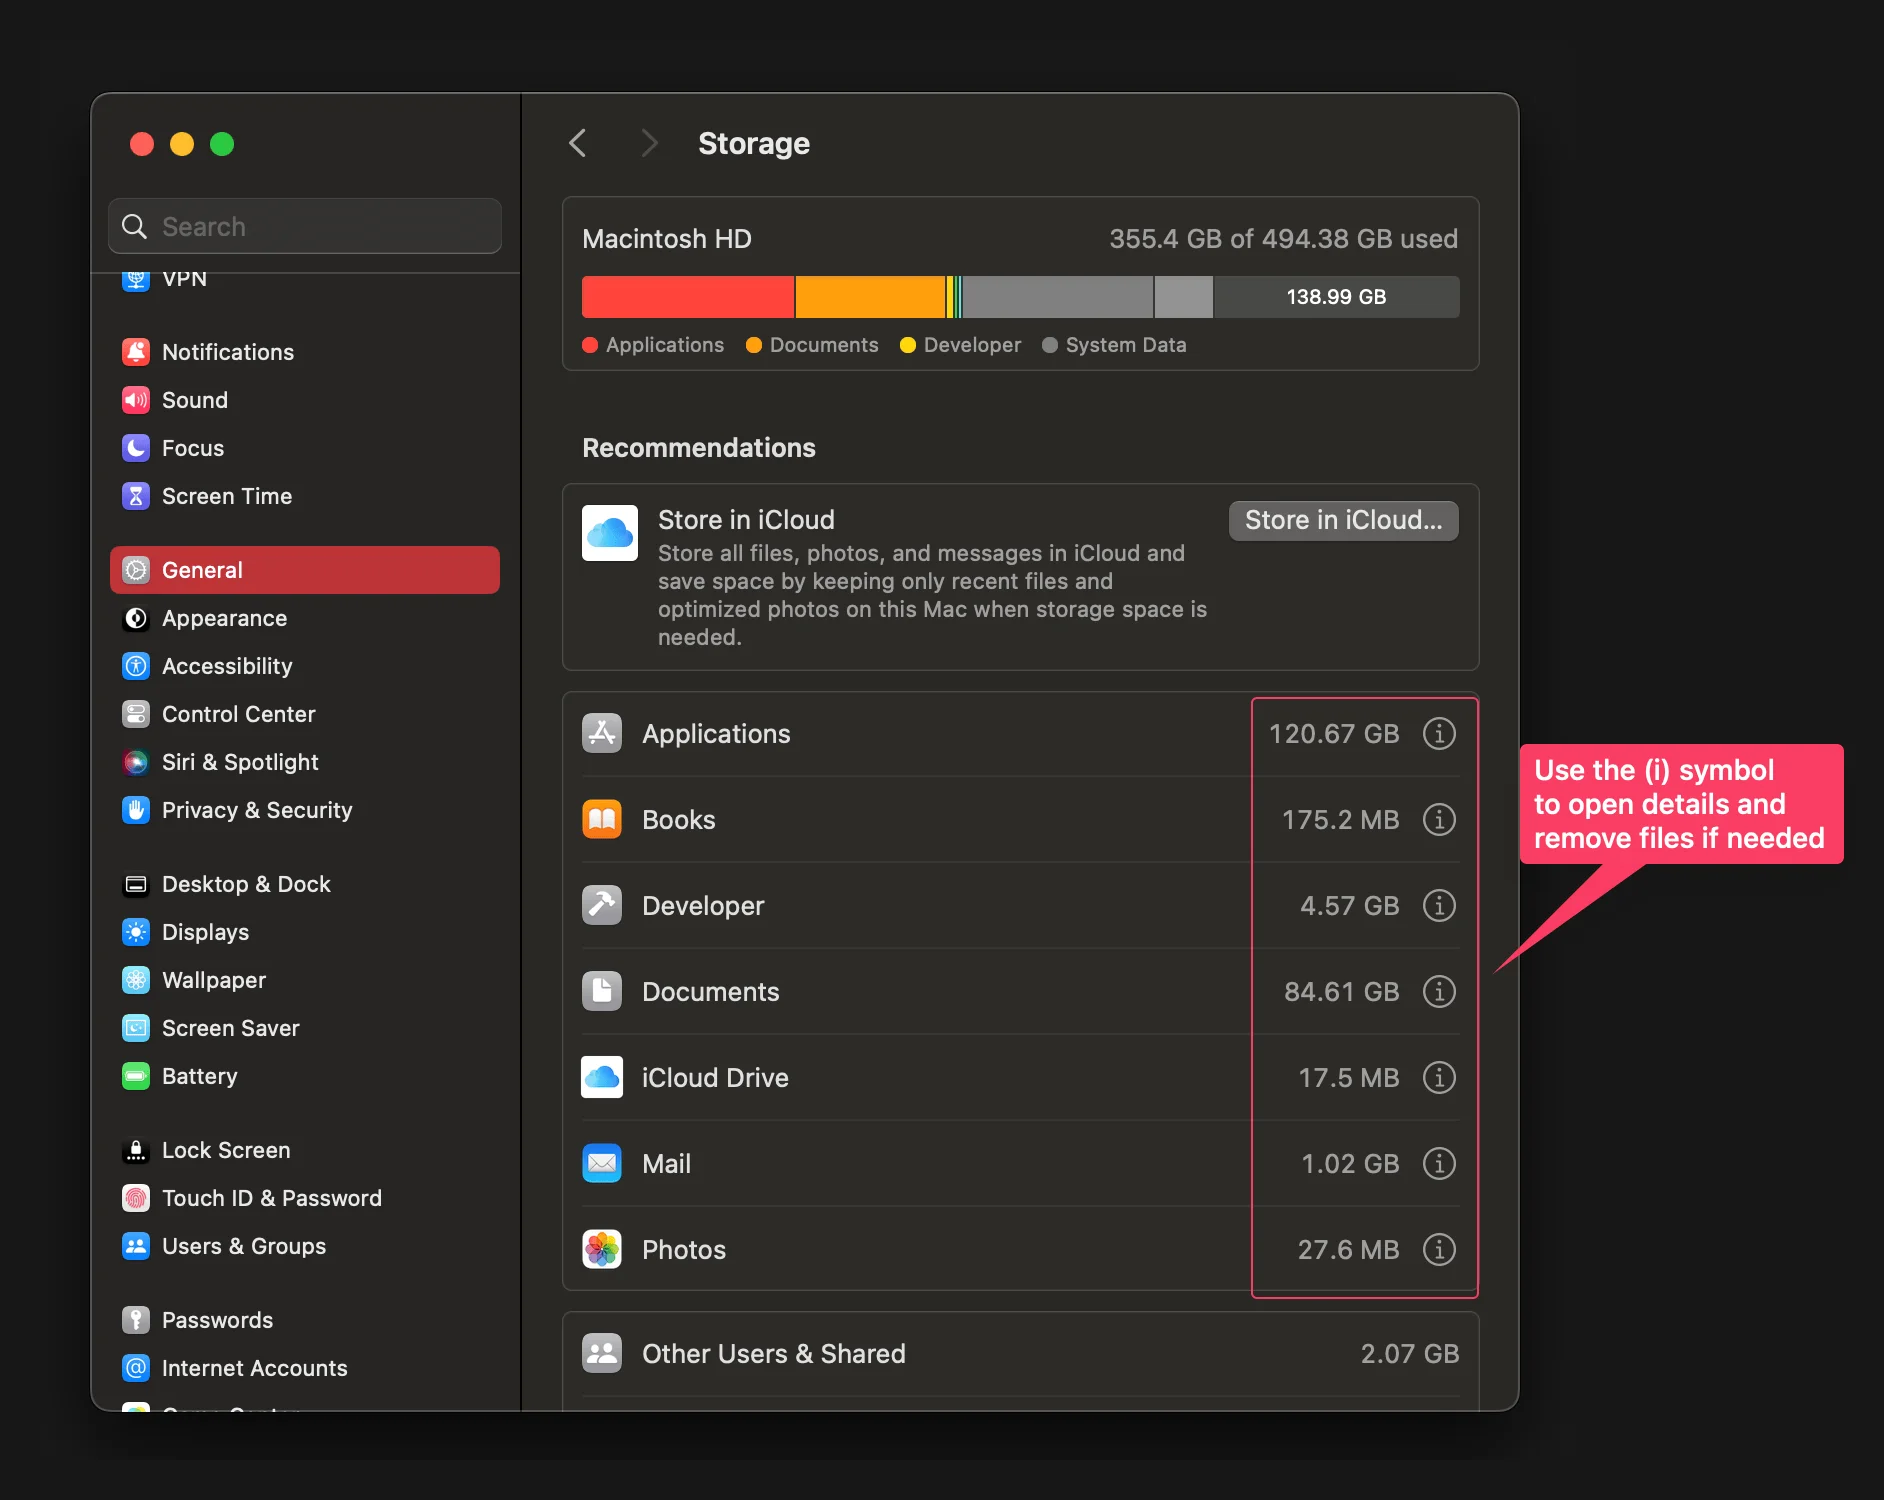
You don’t need a different app to manage your storage, you can do that through settings (and figure out the apps/files using the most space)
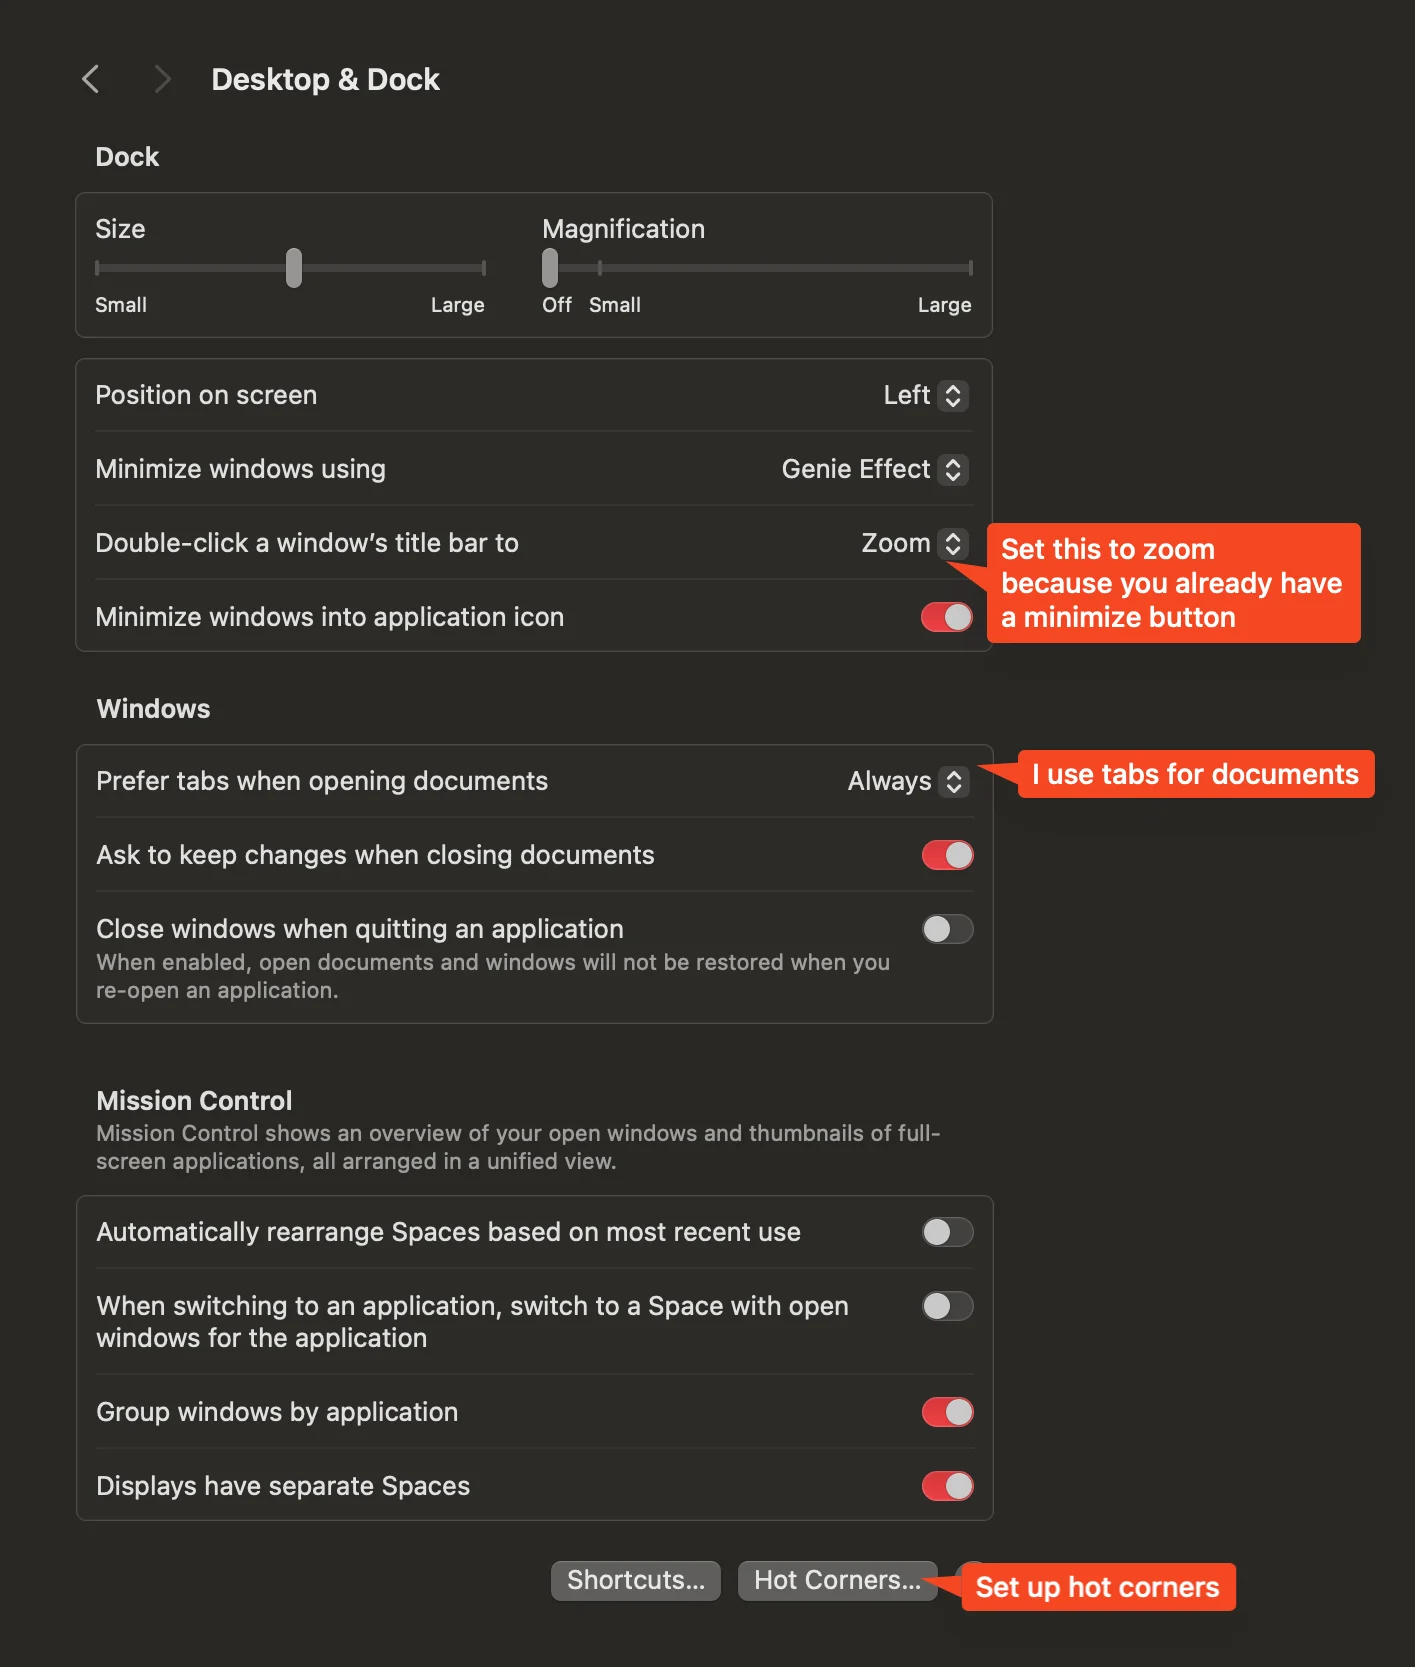
I usually set the double click on window title to zoom, use tabs for documents and set up hot corners, as the bottom right hot corner to open quick note. This is because I have dock on left, which triggered by moving the cursor to bottom left corner.
Keyboard Shortcuts
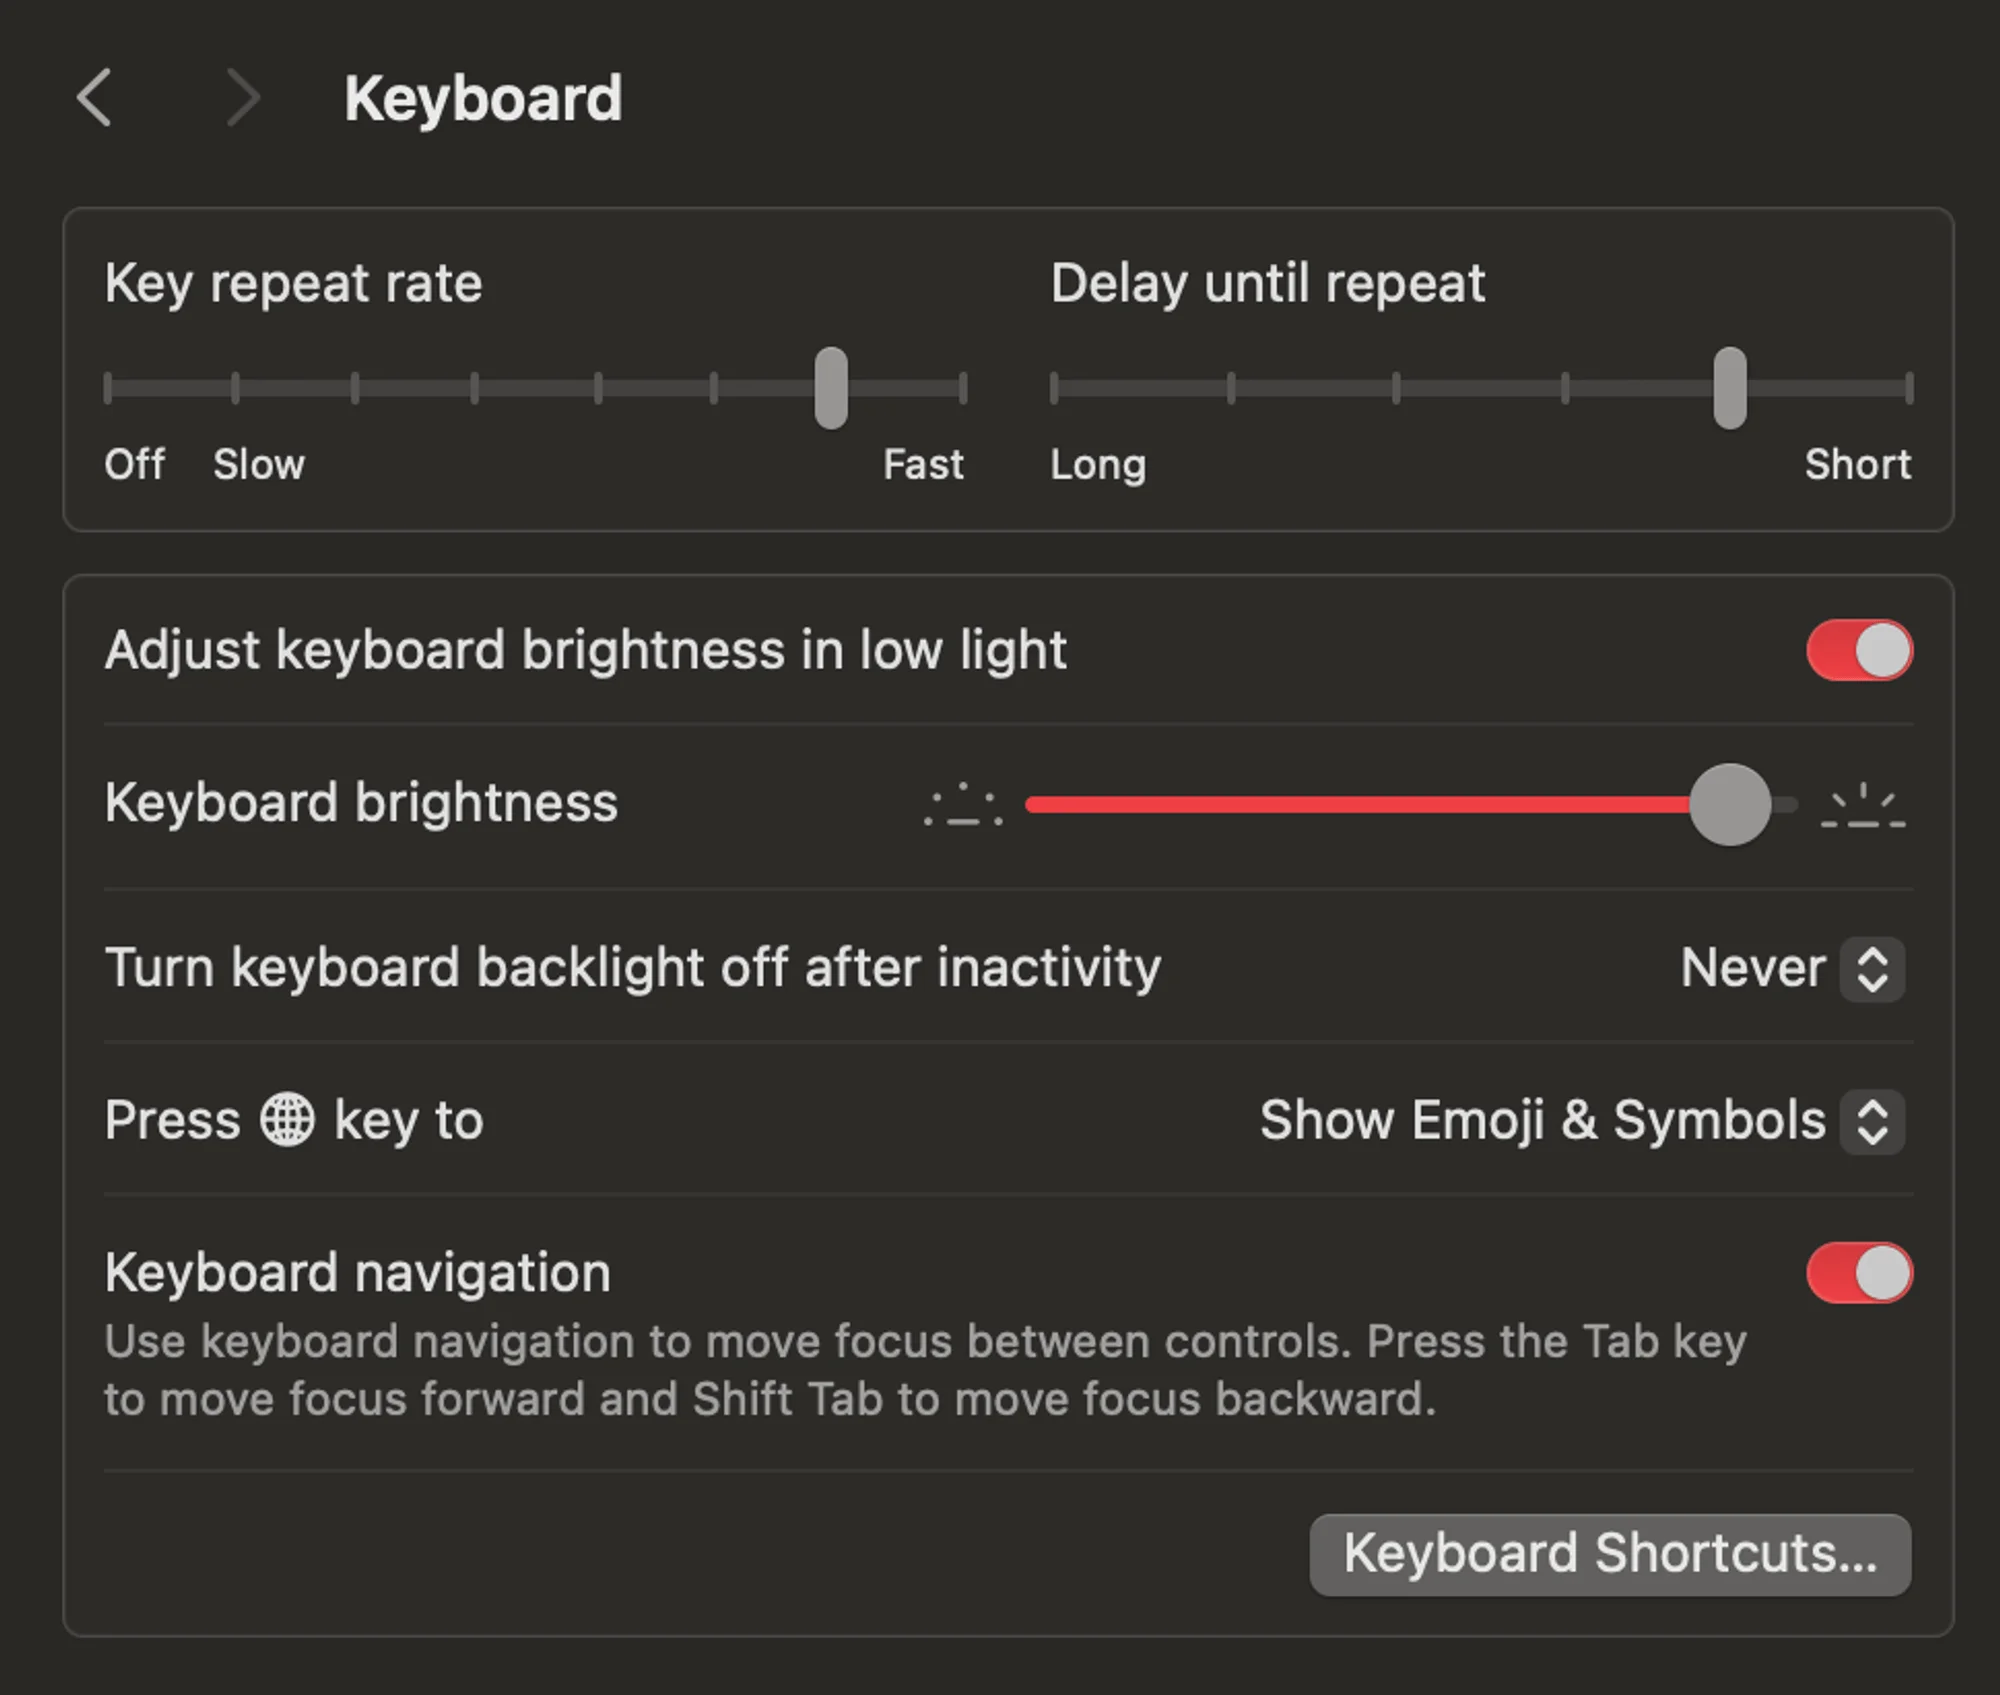
Turn on tab for navigation, such that you can move between button and other pointer event components in MacOS
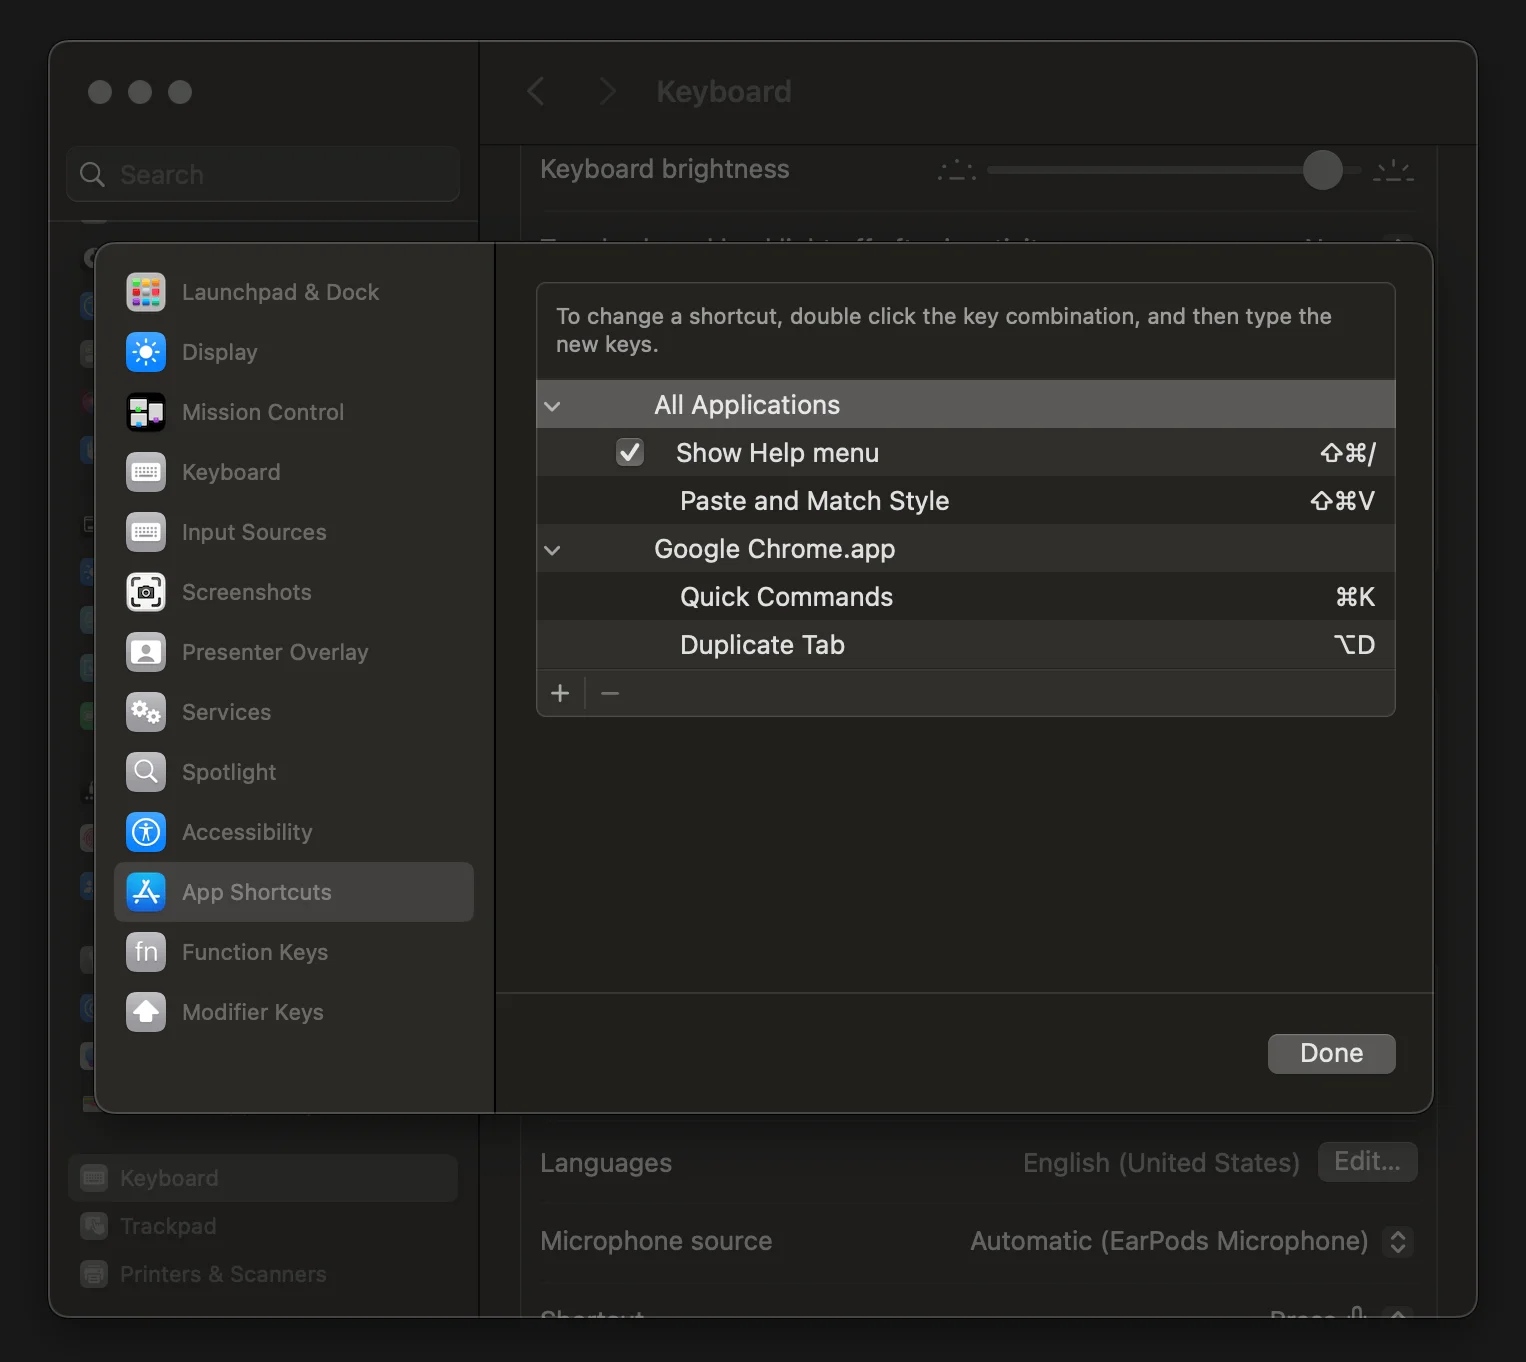
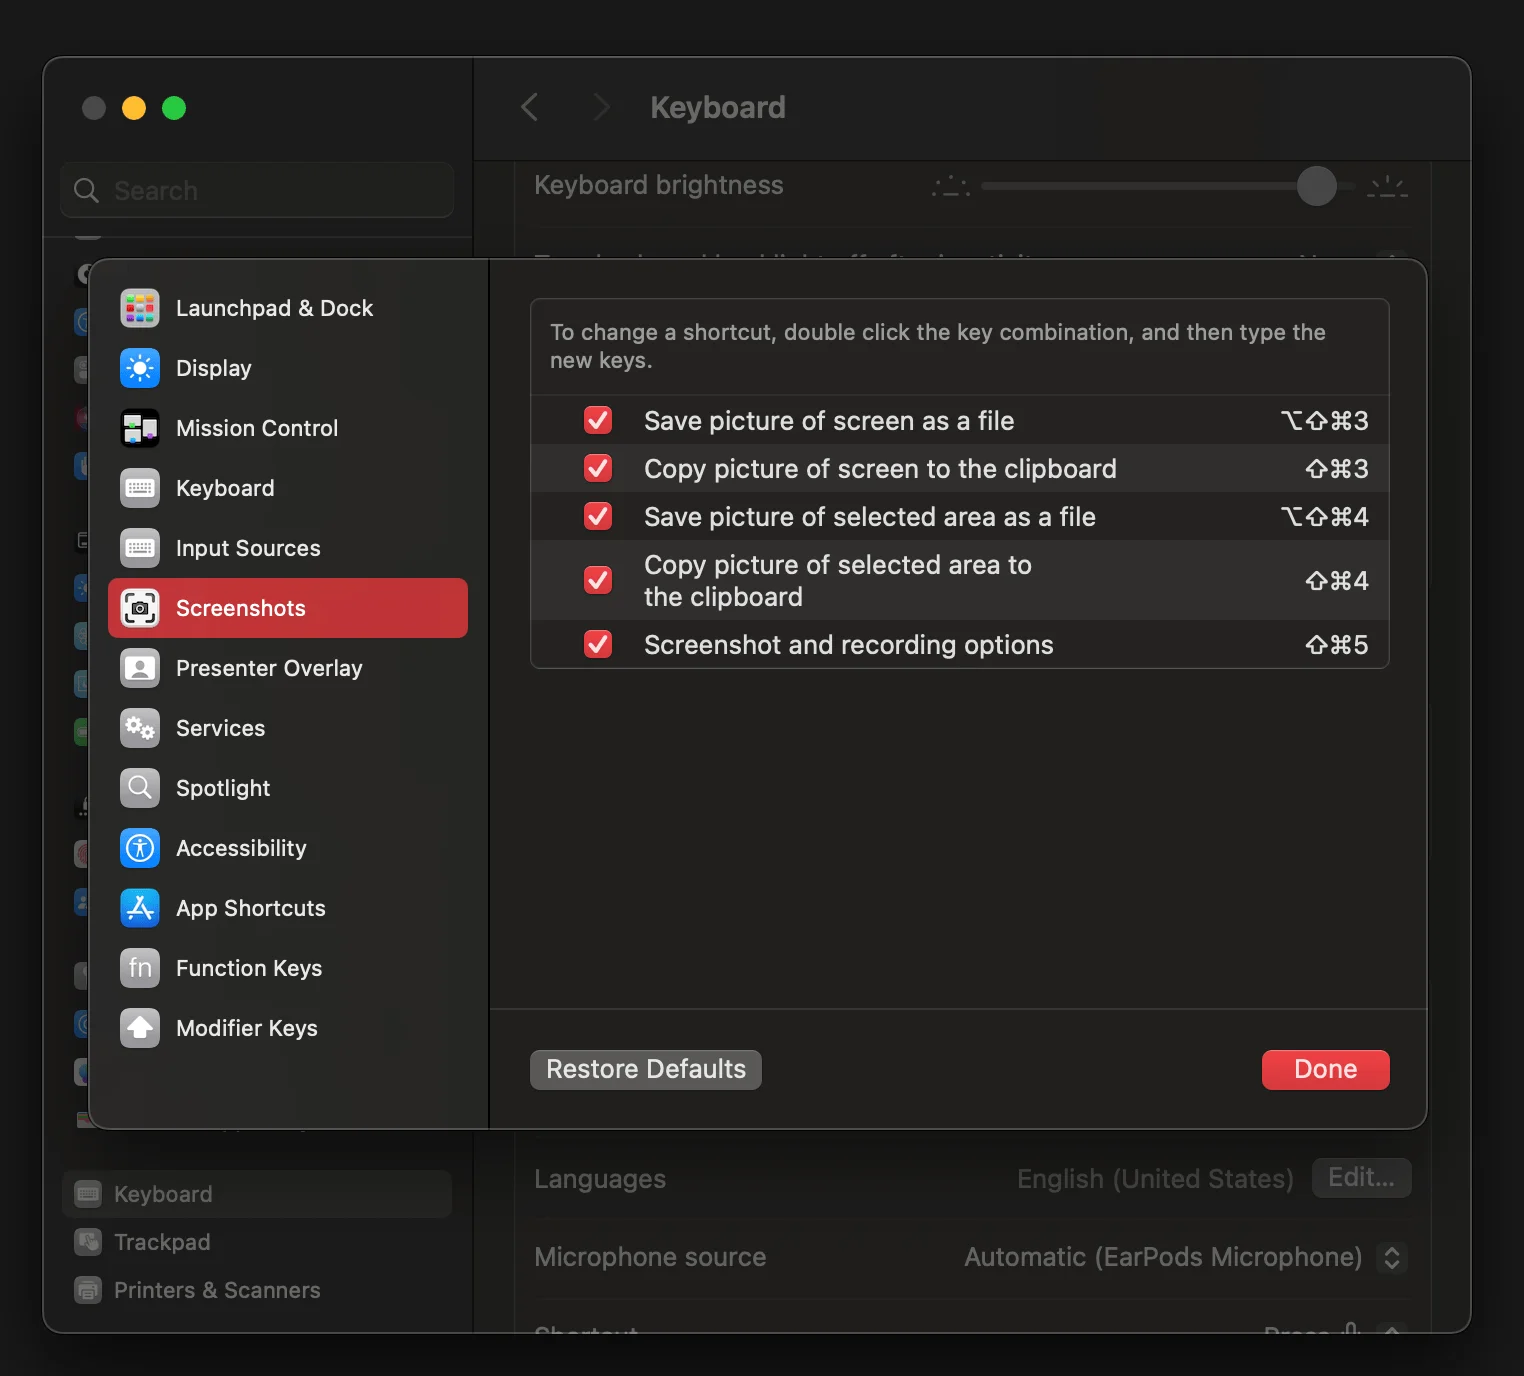
Want to change keyboard shortcuts for any menu options? For example Duplicate Tab still does not have a shortcut in Google Chrome. You can set it under Keyboard Shortcuts, on a global or per app basis.
One of the first things I change are the shortcuts for screenshot. I switch around the shortcut for copy to clipboard and save to file, because often, I am just pasting it somewhere, and I just need it copied to clipboard. An extra tip here courtesy ProperHonestTech, if you use ⌘ + ⇧ + 5 to take a screenshot for a window, it auto adds a shadow around it. You can avoid it by pressing the ⌥ key before you click the Capture button.
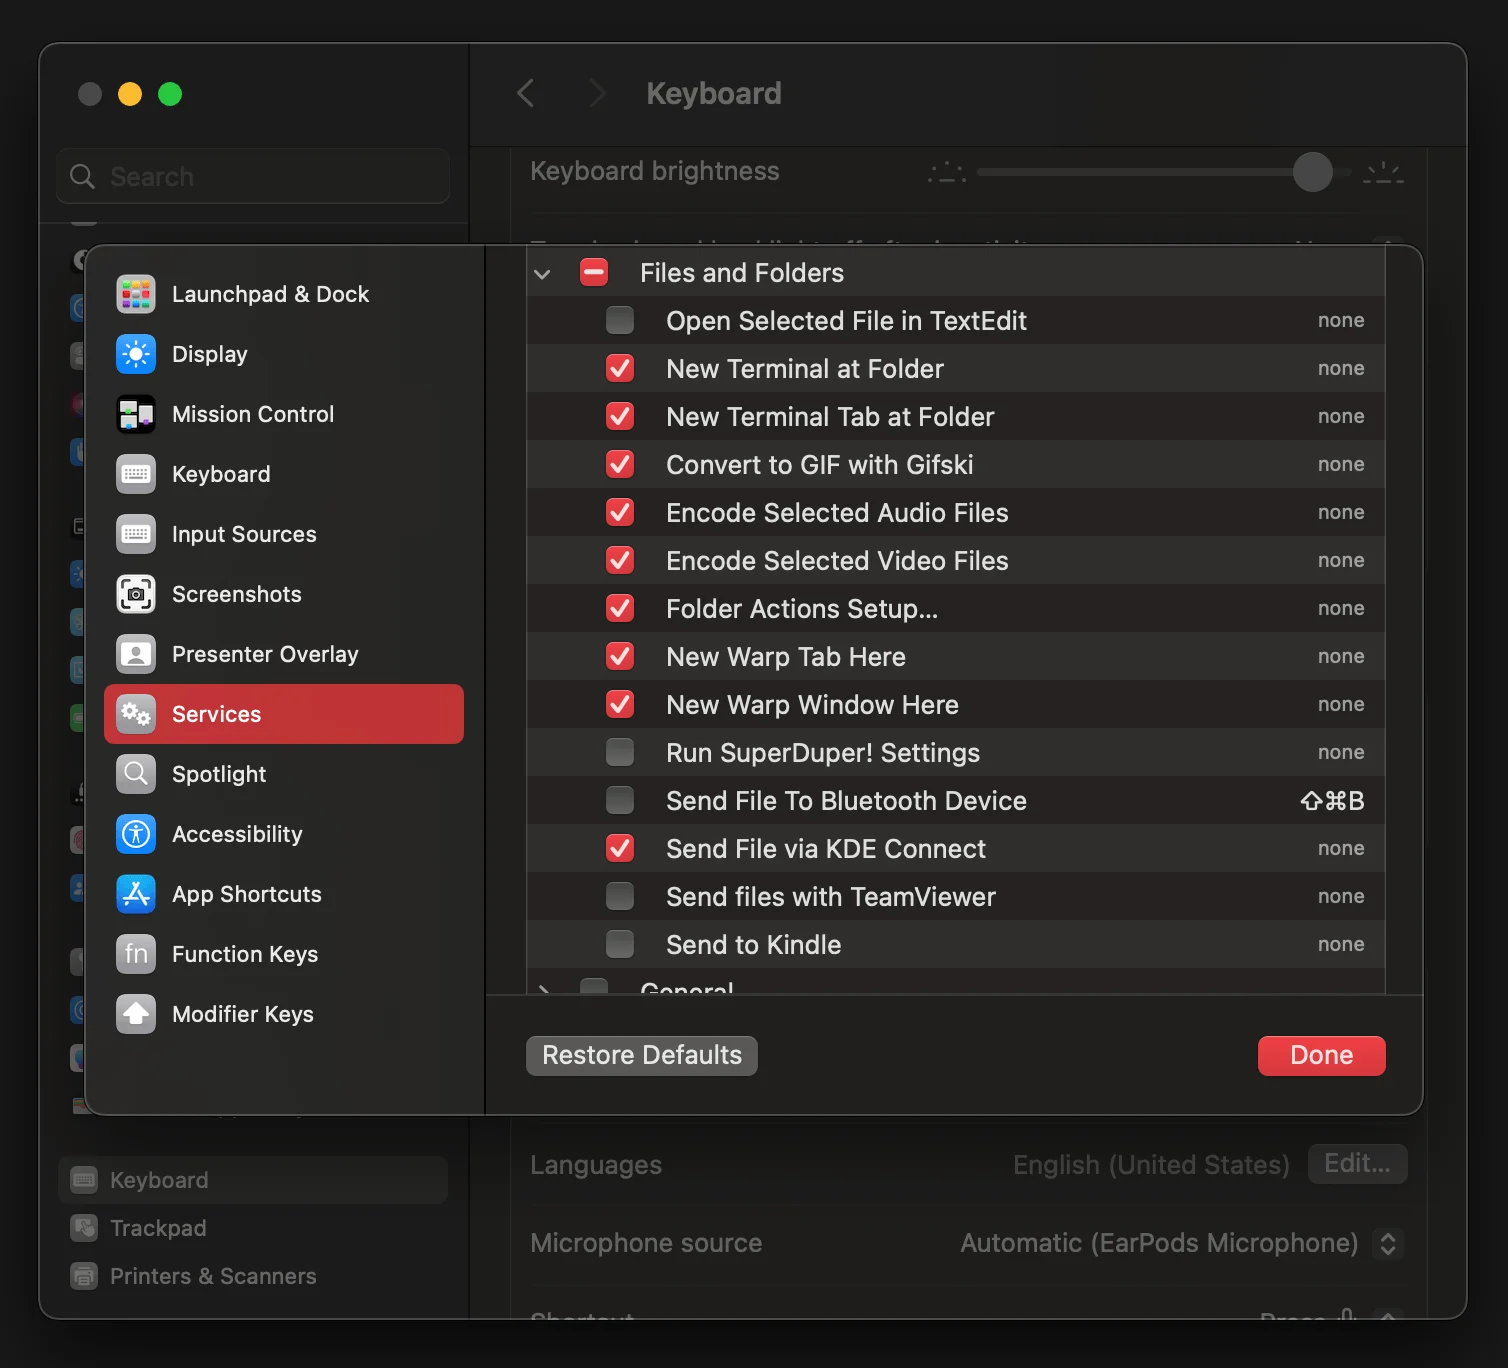
⌘ + ⇧ + 5 to take a screenshot for a window, it auto adds a shadow around it. You can avoid it by pressing the ⌥ key before you click the Capture button.If you look at the services tab, you not only decide the keyboard shortcut for them, but also whether they show up or not. For example, for files and folders, you can turn on New Terminal at Folder as an example of inbuilt app, or Send File via KDE Connect as an example of installed app.
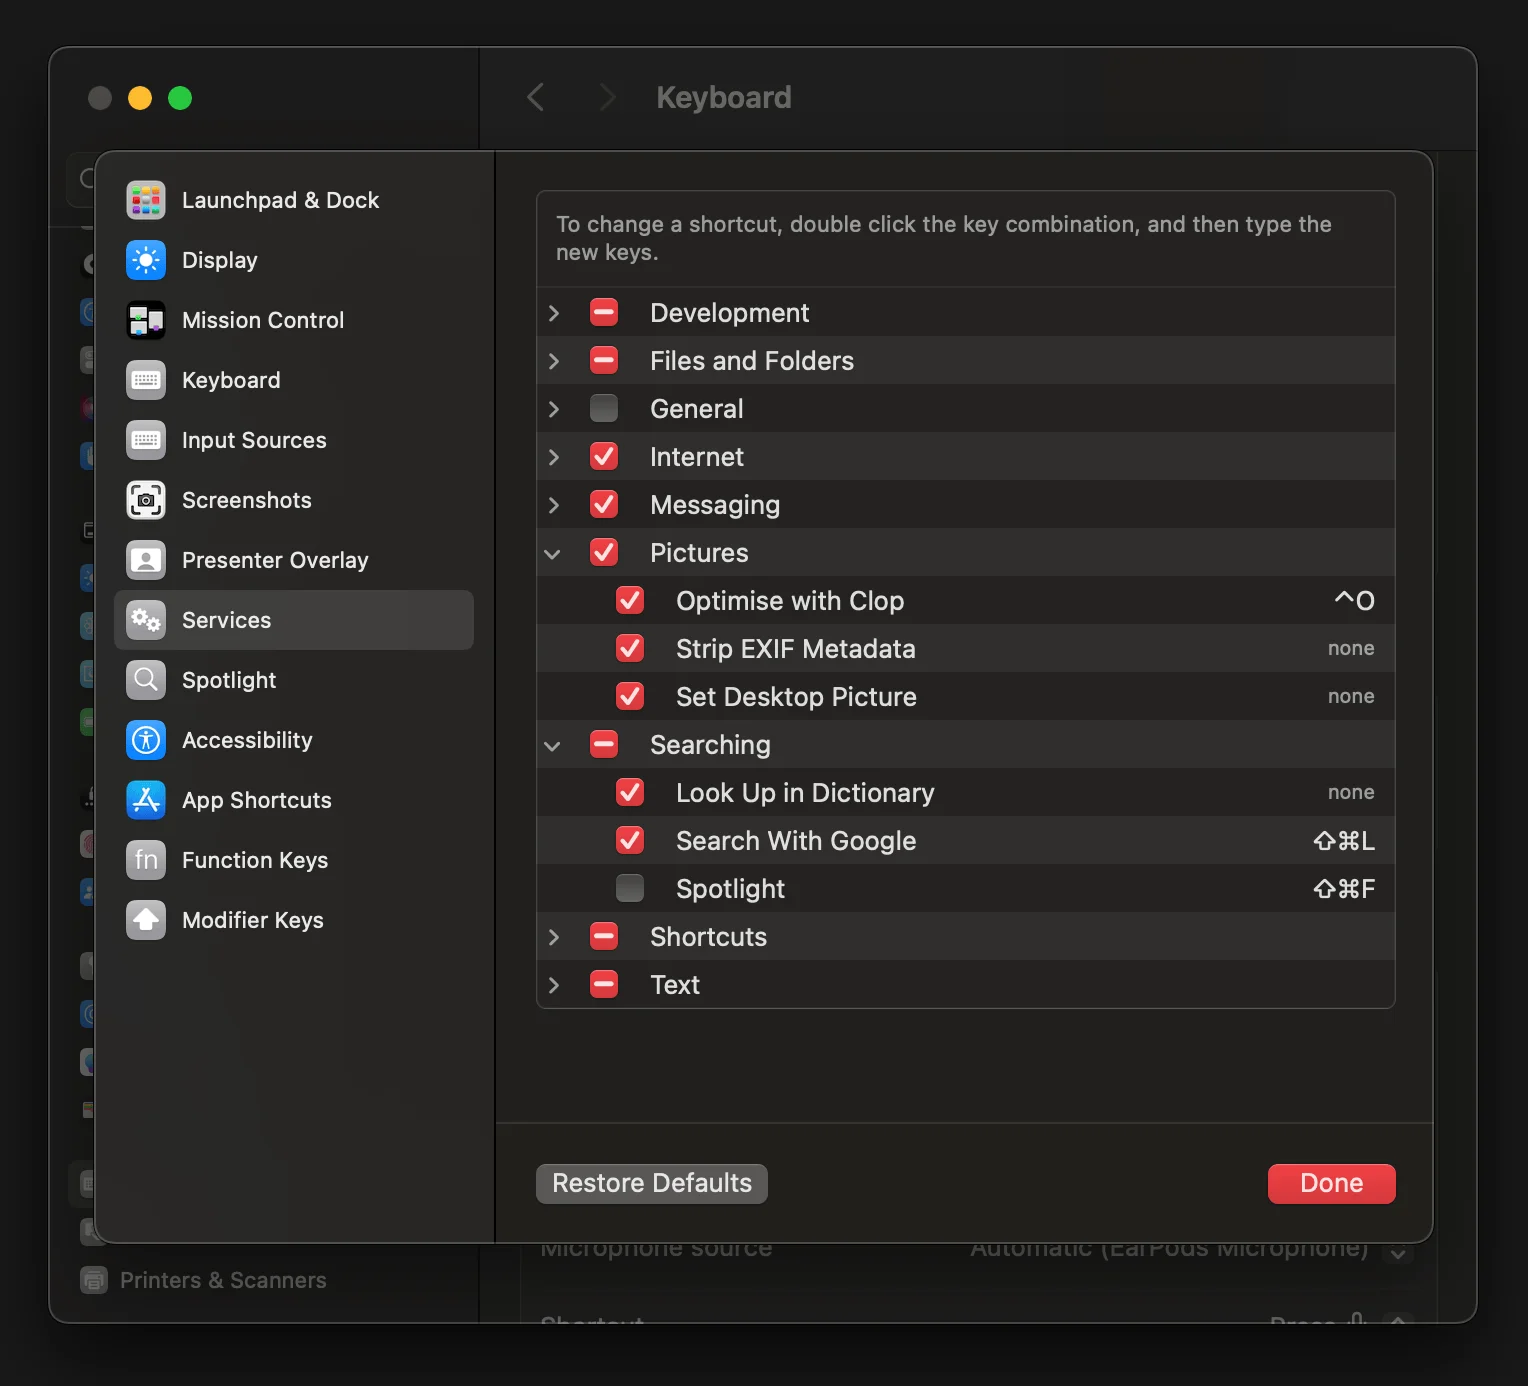
New Terminal at Folder as an example of inbuilt app, or Send File via KDE Connect as an example of installed app.You can set up other things too, such as Clop installs Optimize with Clop under Pictures or turn on the option for Search with Google under Searching.
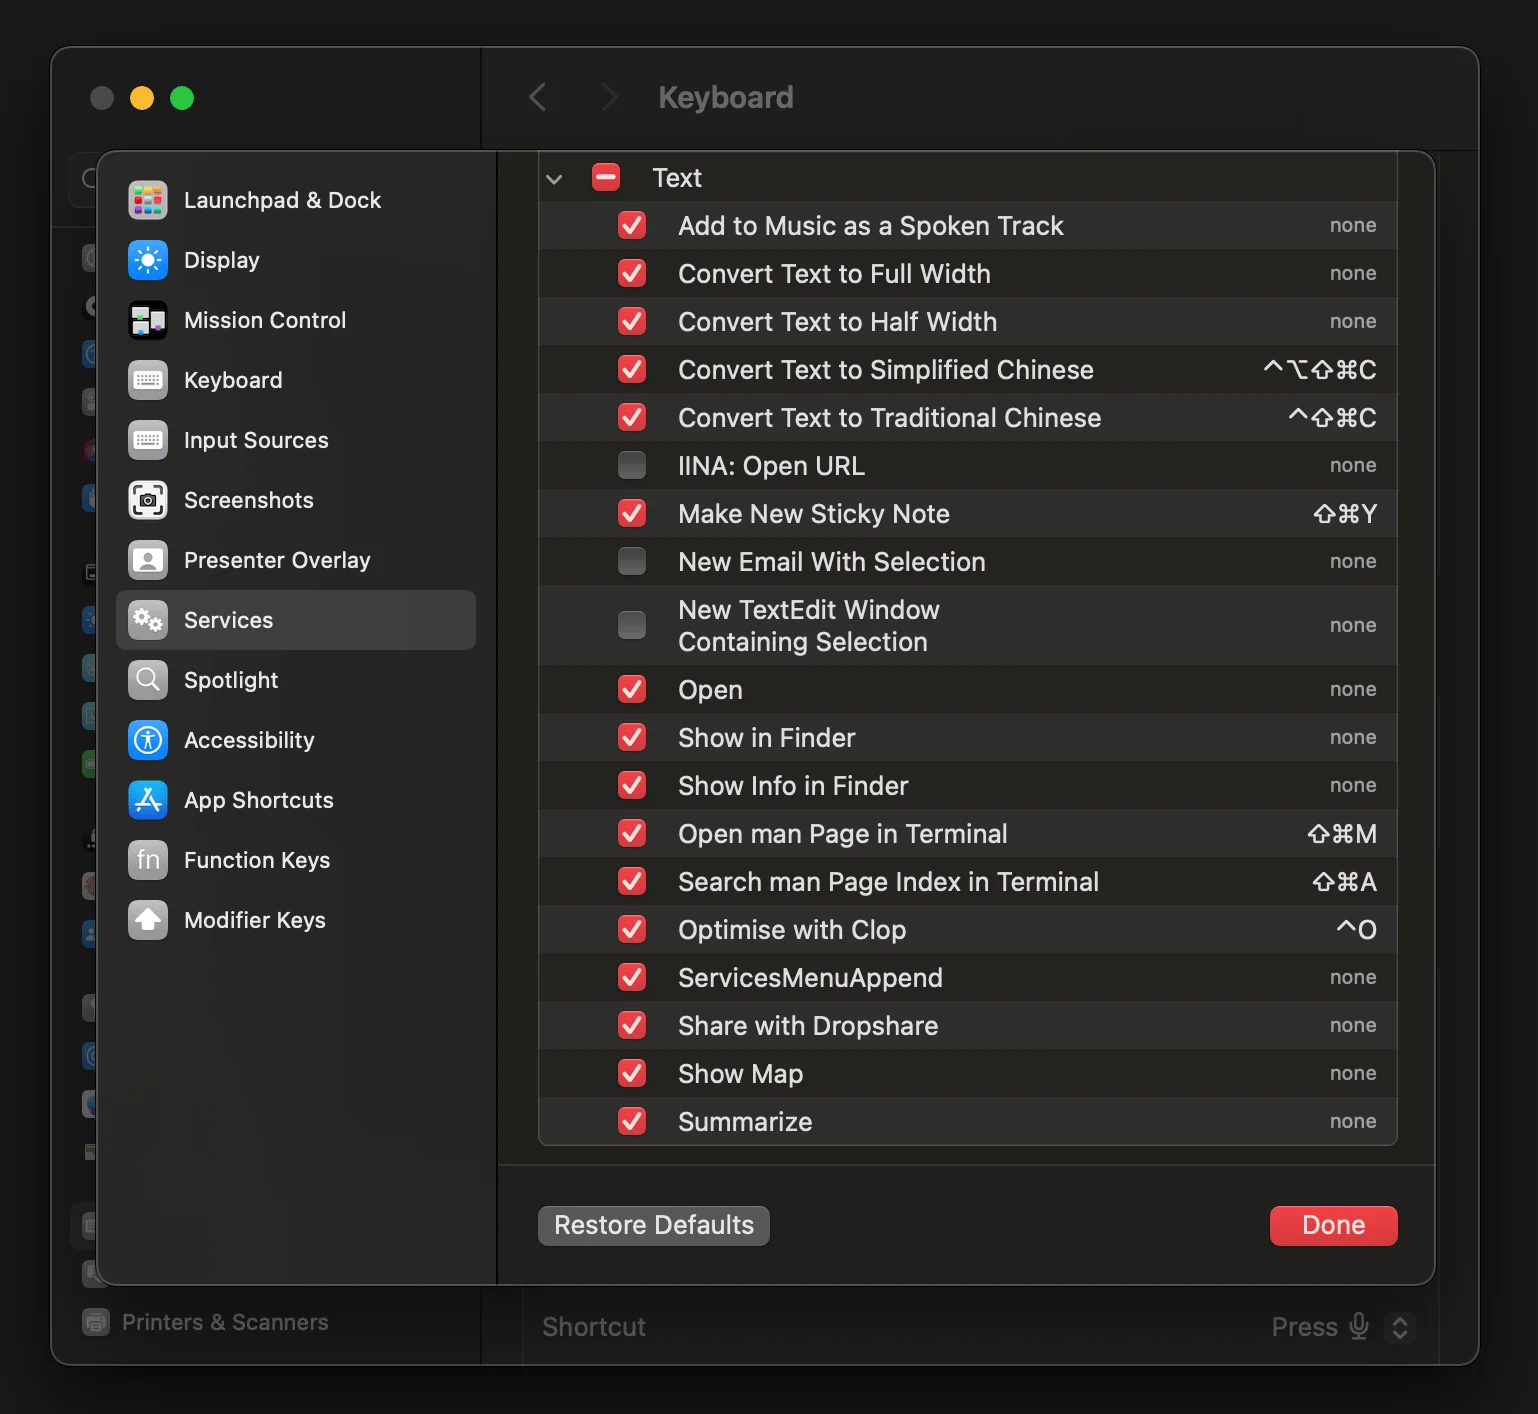
Optimize with Clop under Pictures or turn on the option for Search with Google under Searching.You can decide services that work with text selection. Did you know that you can make a sticky note out of selected text for example and set up a keyboard shortcut to do it?
You can set keyboard and scroll modifier in accessibility settings to zoom into specific parts of the screen in full-screen or picture-in-picture mode. This makes it much easier to highlight content while video recording (similar to Screen Studio) or during screen sharing.
/demo coming soon
Extensions
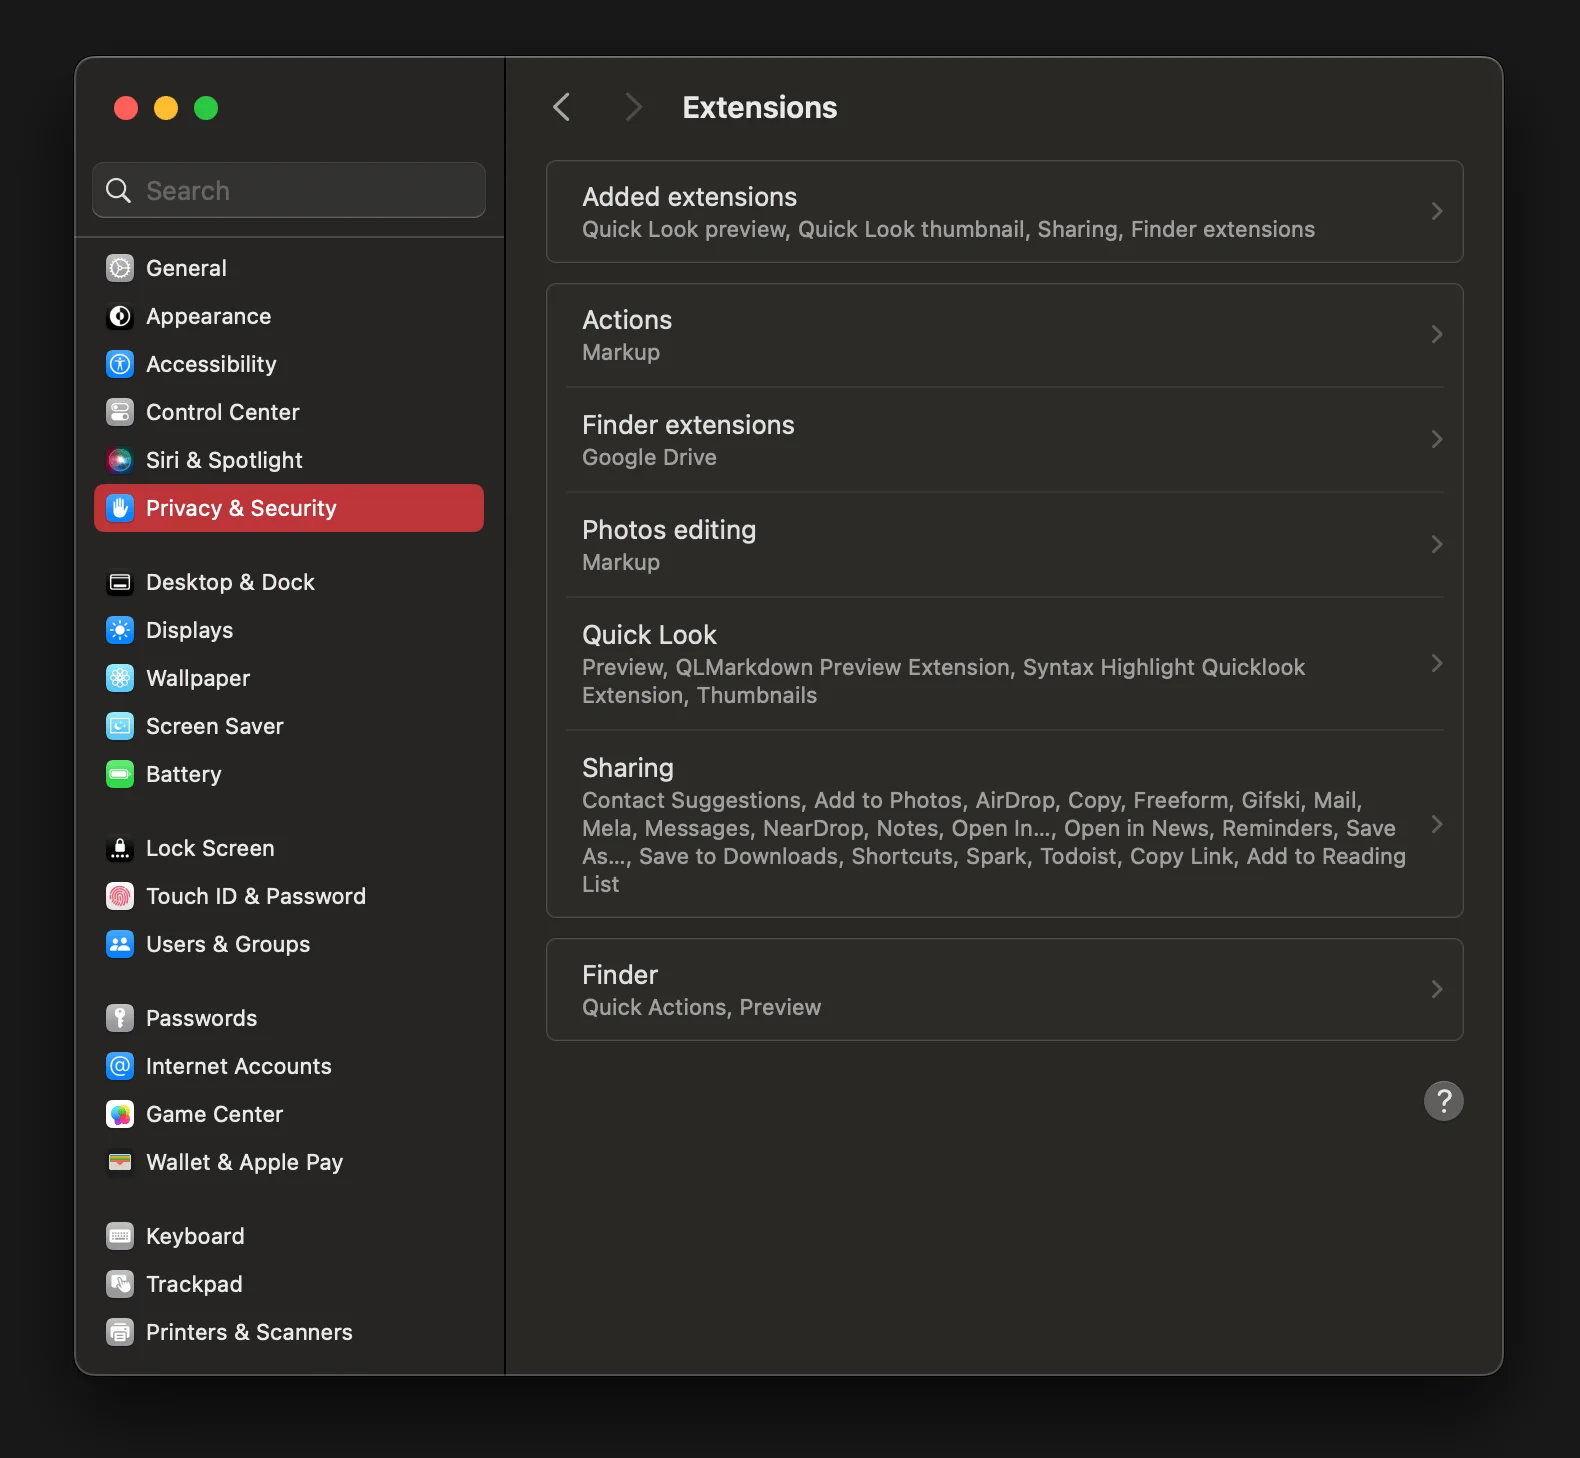
If you scroll down to Privacy and Security section, you will see extensions. Extensions add more options to your files.
The markup options in Actions and Photos should be selected by default
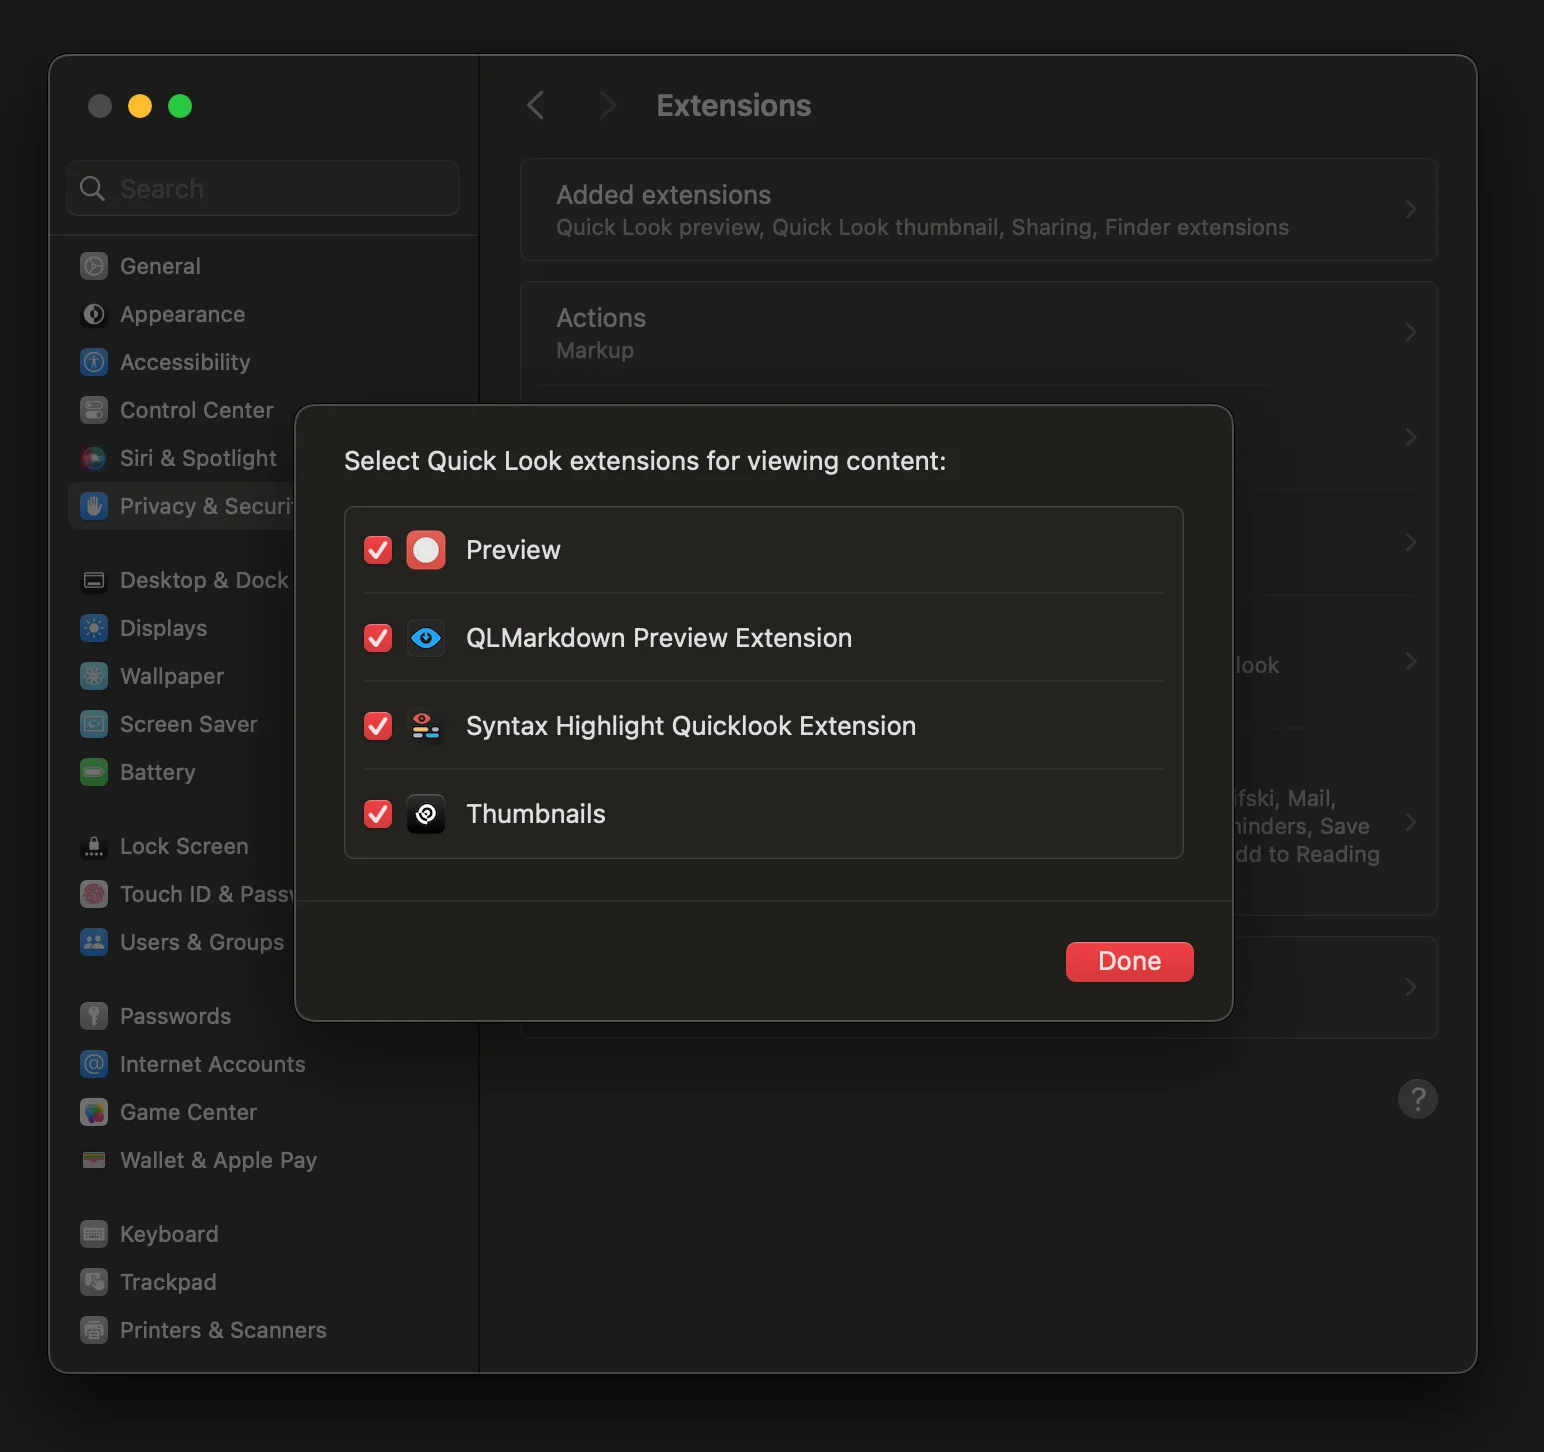
Did you know that quick look options can be extended? For example, the two apps I mentioned above show a better preview of markdown files or of code files, using syntax highlighting.
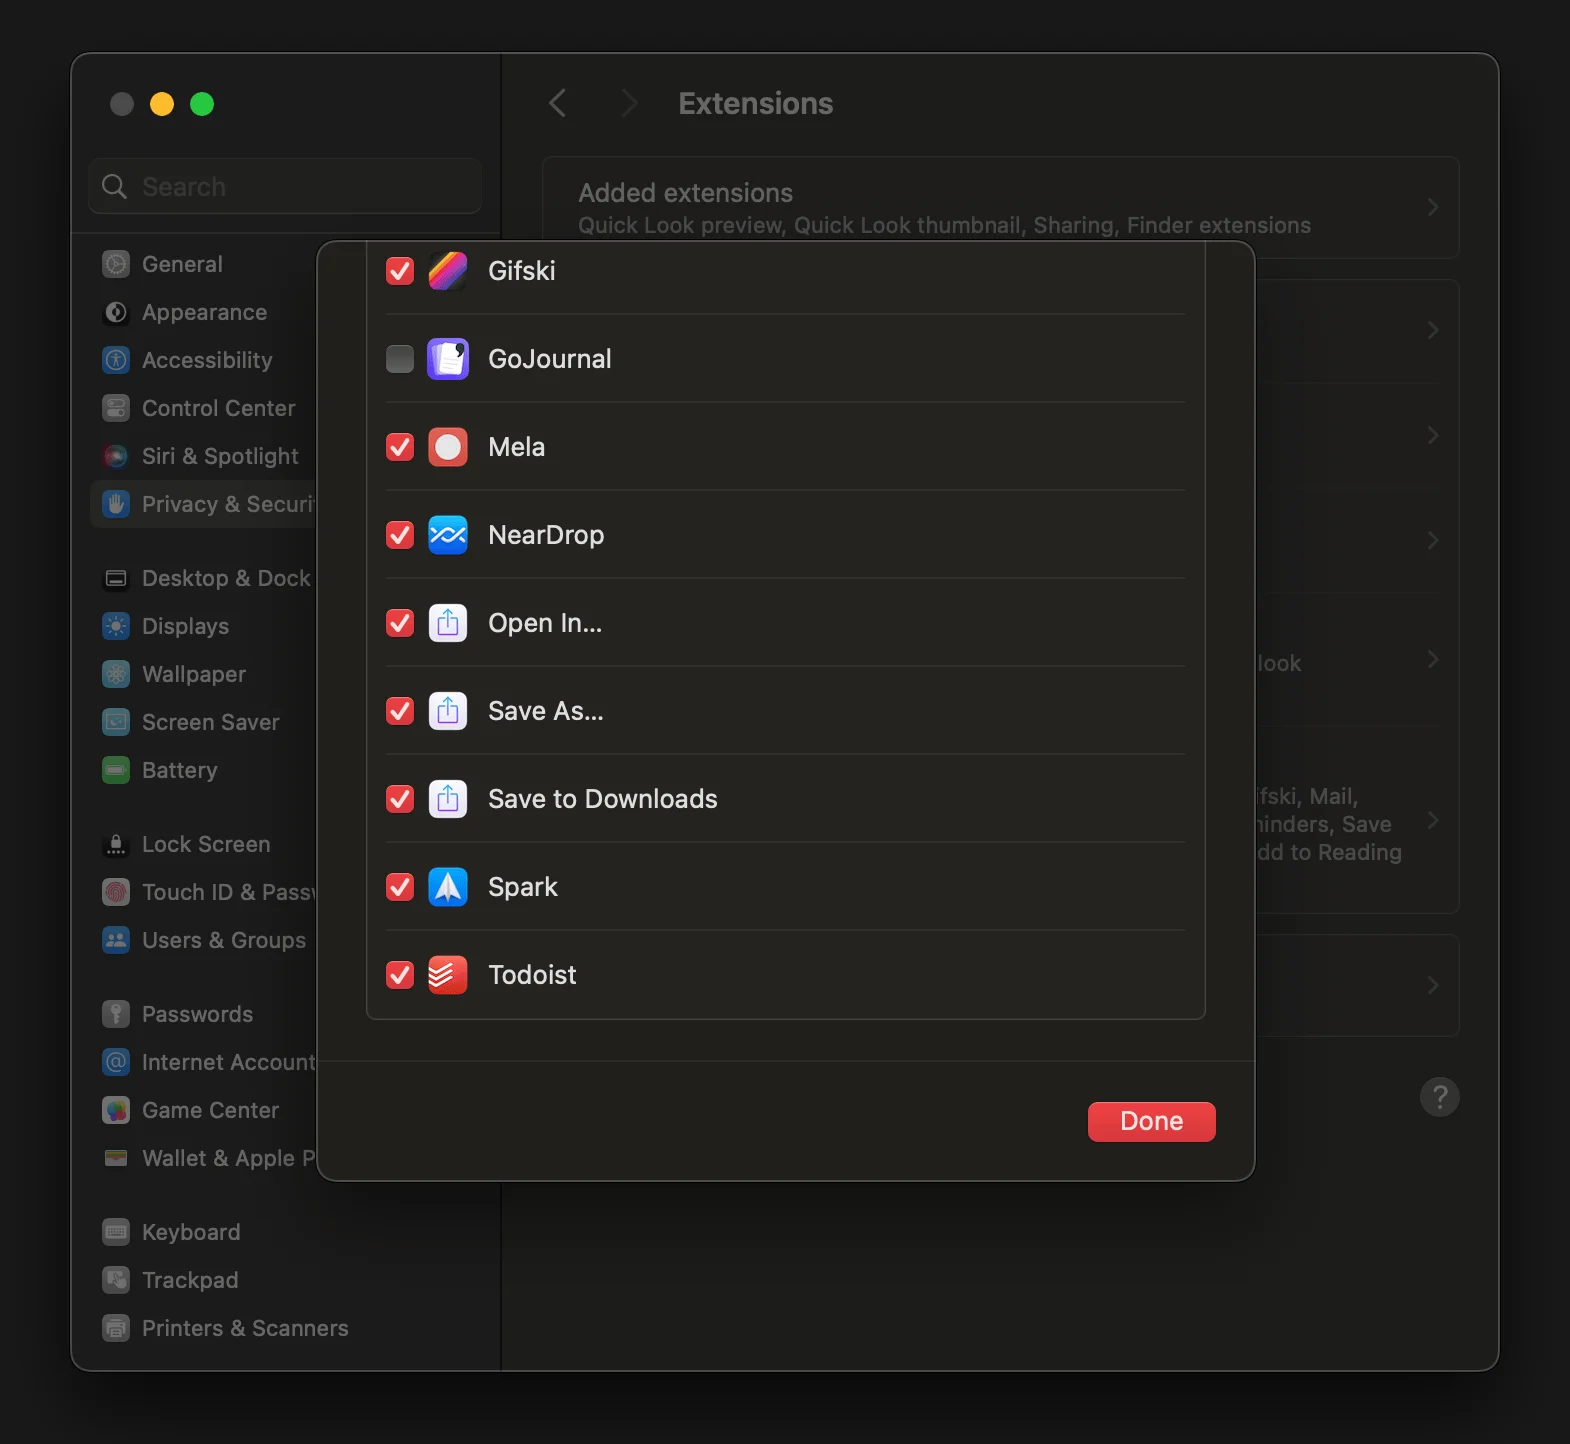
Share extensions can be used by in-built and installed apps. One of the main ones that adds more to this is — Neardrop, that allows you to send files like Airdrop to android phones. This is how, for example, Mela adds the extension to the share menu.
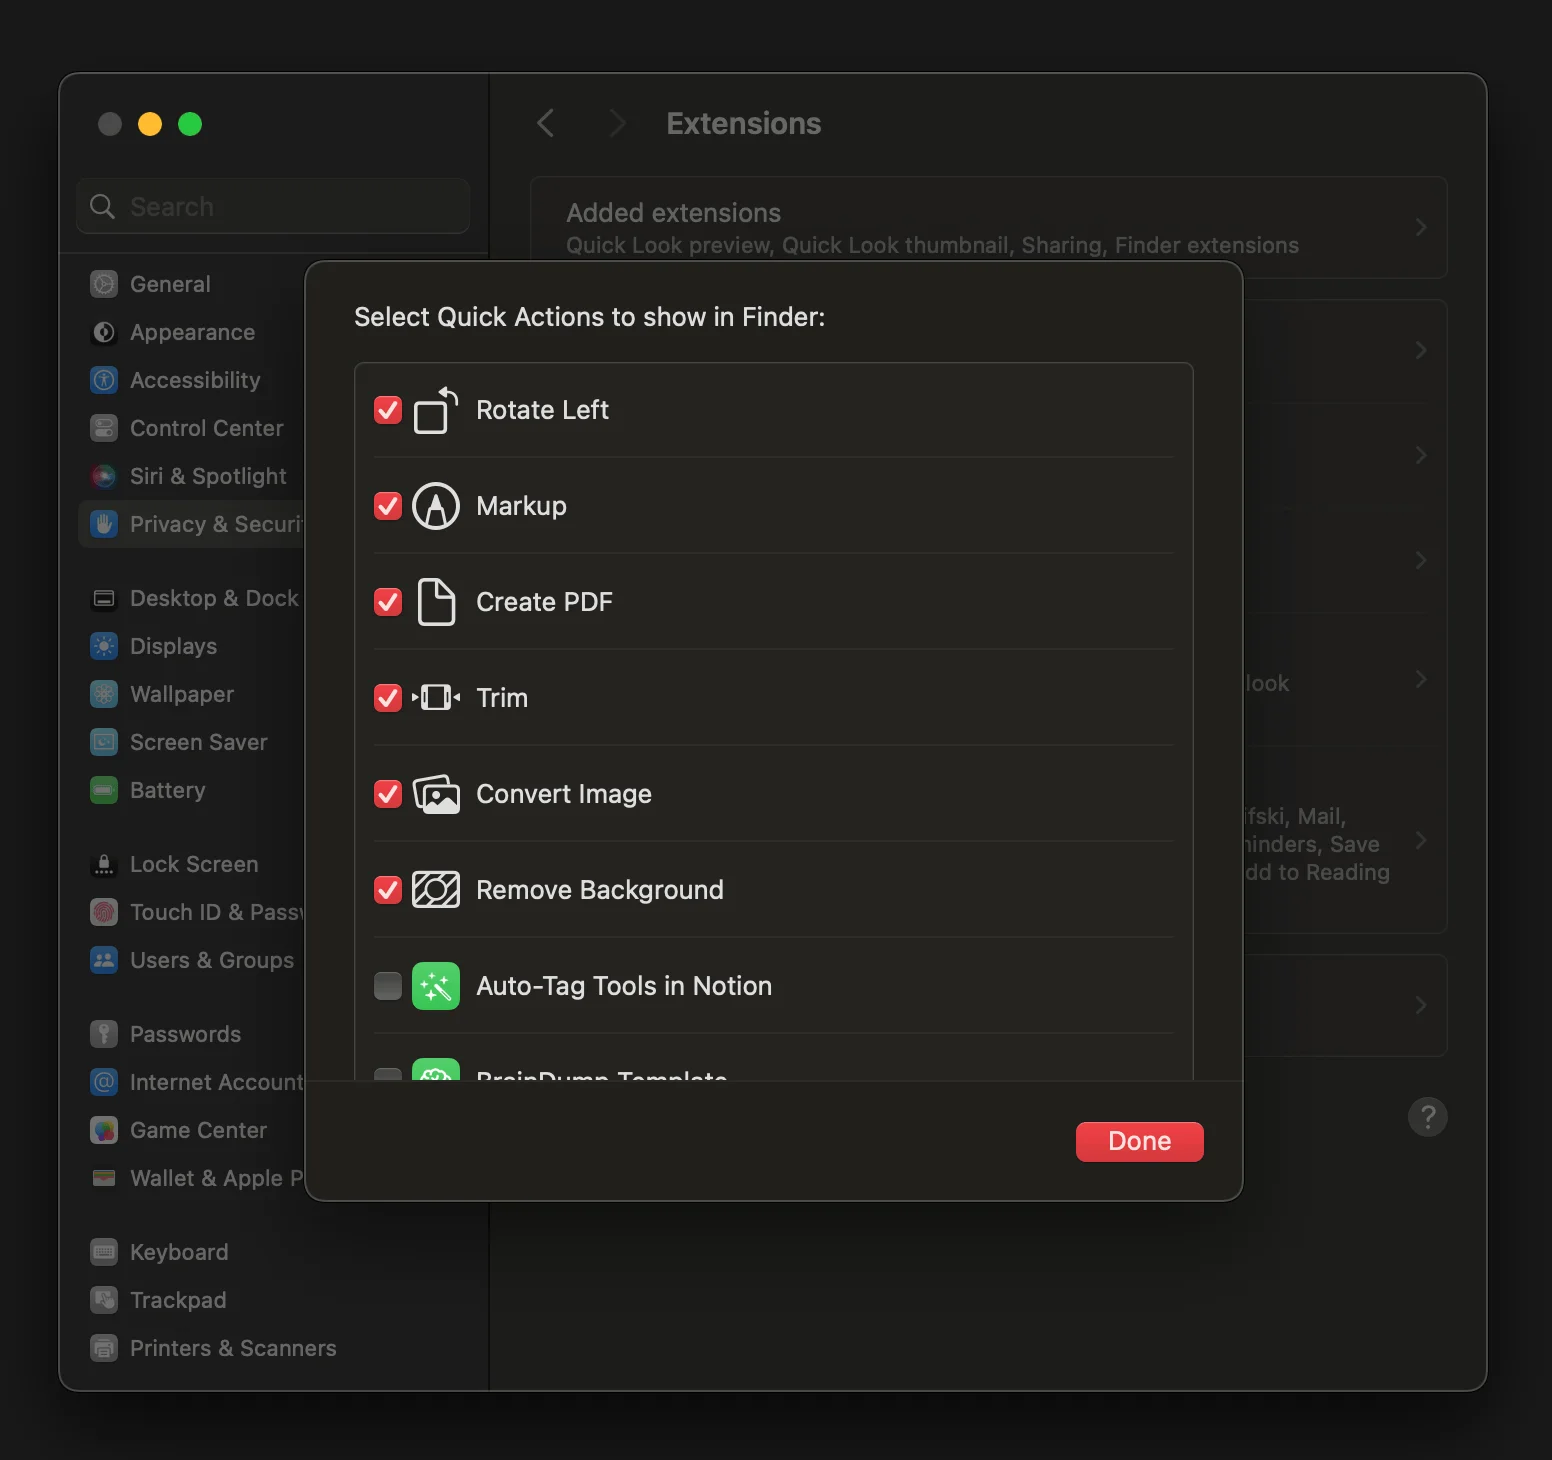
Did you know that apple has an inbuilt option to convert images, remove background, trim videos and create pdfs? Yup. You can turn them on in Quick Actions in the Extensions section.
The Magic of ⌥ and ^ Keys
Along with the ones below, there's also this post by Saurabh I found Mar 2, 2025 about interesting shortcuts in many other Apple apps. Check it out below!
Most people know basic shortcuts that come use the Command (⌘) key. But the Option (⌥) and Control (^) keys are not often ignored, even though in combination with Command (⌘) and/or Shift (⇧) , they can have many different functions.
⌘, ^, ⇧, ⌥. So, if you want to decide your own shortcuts and given there are so so many of them, you can choose to have a hyperkey. Hyperkey is a shortcut that is set to use all the modifier keys above + another key. Because you ain’t pressing 5 keys in one go unless you train to play piano everyday, I’ll suggest using Hyperkey, Superkey (Hyperkey+Seek & Click) or Better Touch Tool to set your hyperkey (which most of the people set to caps lock). System
-
⌘ + ⌥ + esc: Force quit an app. -
⌘ + Click: On a non-focussed window to click on something without focussing it. -
⌘ + ,: Open the preferences menu in many apps (default for Apple apps) -
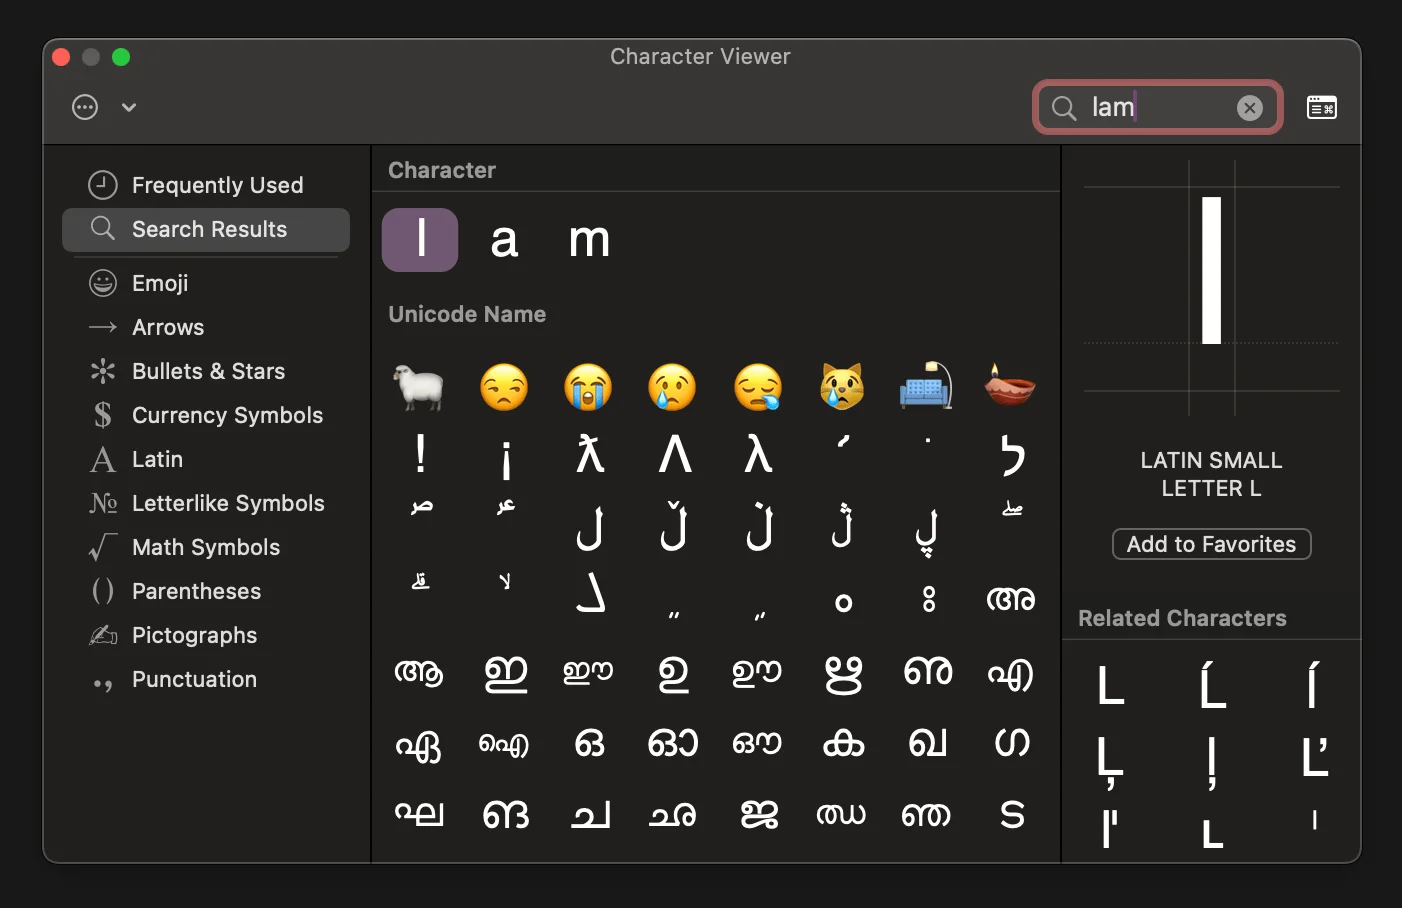
^ + ⌘ + Space: Character Viewer -
⌥ + ⌘ + V: Move the files in the Clipboard from their original location to the current location.I use the app Command X to cut and paste into a different location instead of remembering this shortcut. -
⌘ + Y: Use Quick Look to preview the selected files.⌘ + ⌥ + Y: View a Quick Look slideshow of the selected files. -
⌘ + ⌥ + H: Hide all windows but the current one. -
⌘ + Tab: Switch to the next most recently used app among your open apps. if you use the shortcut⌘ + ⌥ + Hto hide the windows, then you can access them using⌘ + Tab, unlike when you minimize them.⌘ + `: Switch between the windows of the app you're using.Note: The second key might vary based on keyboard layout. It is the key right above the
Tabkey on the keyboard. -
⌥ + ⌘ + power button: Put your Mac to sleep. -
⌃ + ⌘ + Q: Immediately lock your screen. -
⌃ + ⇧ + ⌘ + T: Add selected Finder item to the Dock. -
⌥ + ⌘ + Del: Delete item skipping moving to trash. -
⌥ + ⇧ + Keyboard/Display Brightness Up/Down: Adjust the display brightness in smaller steps. Add the Control (^) key to this shortcut to make the adjustment on your external display, if supported by your display. -
^ + Down Arrow: Show all windows of the front app. -
⌥ + Drag: Copy the dragged item. The pointer changes while you drag the item. -
⌥ + ⌘ + Drag: Make an alias of the dragged item. The pointer changes while you drag the item. -
⌥ + Right click: Show the option to change the always open with property. -
⌥ + click on green traffic light: Maximize window instead of go into full screen. I also set double click on window title to maximize (here). -
⌘ + ⇧ + /, aka⌘ + ?: Search through menu bar items
Documents and Text
-
⌥ + ⇧ + ⌘ + V: Paste and Match Style: Apply the style of the surrounding content to the item pasted within that content. -
⌃ + P: Move up one line. -
⌃ + N: Move down one line. -
⌃ + A: Move to the beginning of the line or paragraph. -
⌃ + E: Move to the end of a line or paragraph. -
⌥ + ⇧ + ↑: Extend text selection to the beginning of the current paragraph, then to the beginning of the following paragraph if pressed again. -
⌥ + ⇧ + ↓: Extend text selection to the end of the current paragraph, then to the end of the following paragraph if pressed again. -
⌥ + ⇧ + ←: Extend text selection to the beginning of the current word, then to the beginning of the following word if pressed again. -
⌥ + ⇧ + →: Extend text selection to the end of the current word, then to the end of the following word if pressed again. -
⌃ + D: Delete the character to the right of the insertion point. Or useFn + Delete. -
⌘ + K: Add a web link. -
⌃ + ⌘ + D: Show or hide the definition of the selected word. This also shows link previews in Safari ! (the more you know)
- You can create document templates, such that you don’t need to worry about modifying the original document, hence, called “stationery” in MacOS. To do this, select the document and use
Get Infoor⌘ + I. In the general section, selectStationery pad. Make sure it is a document you can edit, and not a folder or an alias. Now, everytime you open that document, it will duplicate itself — without you needing to worry about modifying the original.
On the Internet 🌐
If you enjoyed reading this and found something that clicked for you, please consider supporting me by buying me a coffee here:

